
Introduction
There are several good documents on how to update VMware tools on a Citrix PVS master image when we use either PXE or Option 66/67. Here is the link to one of the documents my good friend Reubin Huckle wrote HowTo: Upgrade VMware Tools on a Windows PVS Image Without Reverse Imaging (ferroquesystems.com) which is applicable to PVS environments that network boot, not for BDM boot scenarios.
In this blog, I want to share how to update VMware tools when you are using BDM as a boot method that will get around the need to reverse image a vDisk. Let’s make sure to mention a couple of issues that I have experienced while doing this process.
- If you attach VMXNET3 and E1000 NIC the BDM is ignored and the VM is trying to boot from the PXE. I still did not find why, but if you do have to NICs attached the boot sequence will fail.
- When you add/remove NICs from a VM, leave the MAC address automatic as if you set it to manual you may experience a blue screen once a NIC is changed. So, change the NIC, and update the VM in the PVS console with the proper MAC address.
Steps
So, let’s start with the steps.
| 1 | Create a PVS maintenance version or copy a vDisk and place it into private mode. Boot the VM with the VMXNet3 NIC driver. |
| 2 | While VM s running, go to the VMware console and attach E1000 NIC. I left it not connected, as at one point the addition of the NIC as connected resulted in a bluescreen.
|
| 3 | Let Windows install the E1000 driver. You can check it in your device manager if enabling “Show hidden devices”. |
| 4 | Shut down the VM. |
| 5 | Remove the VMXNET3 NIC from the VM.
|
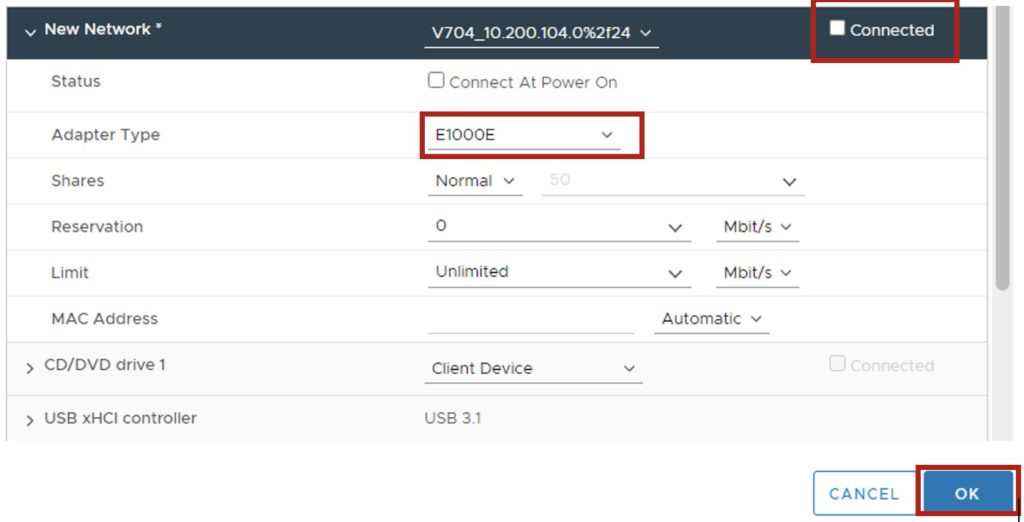
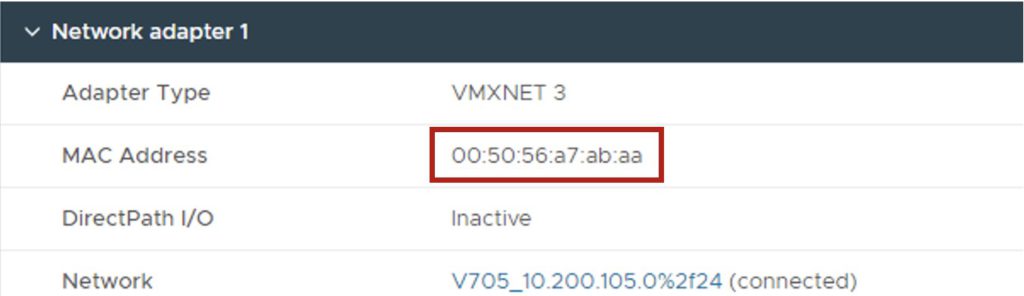
| 6 | Click on E1000 NIC and Click on Connected (make sure that Connected At Power On is also checked). |
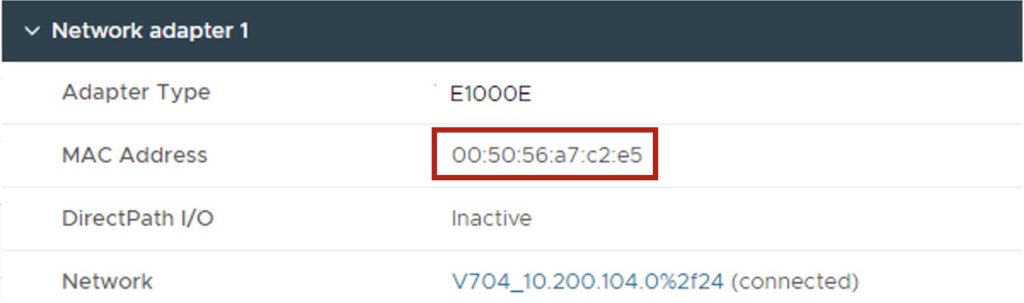
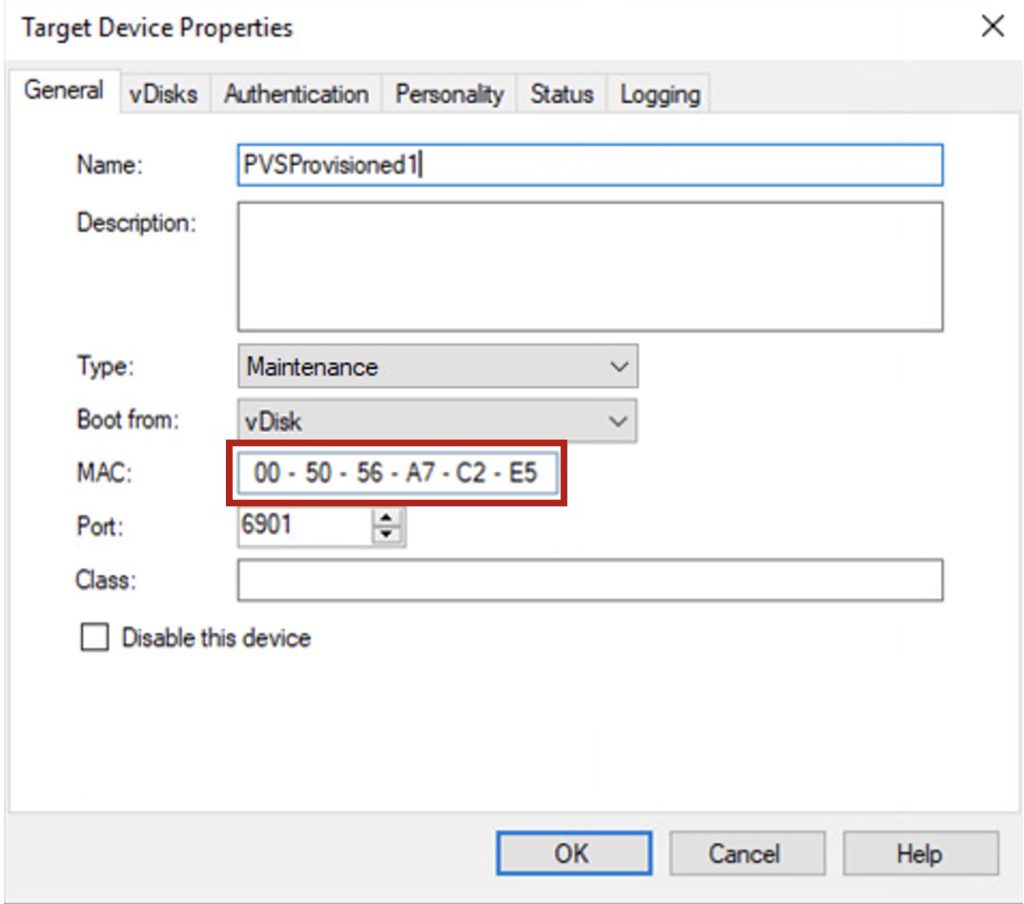
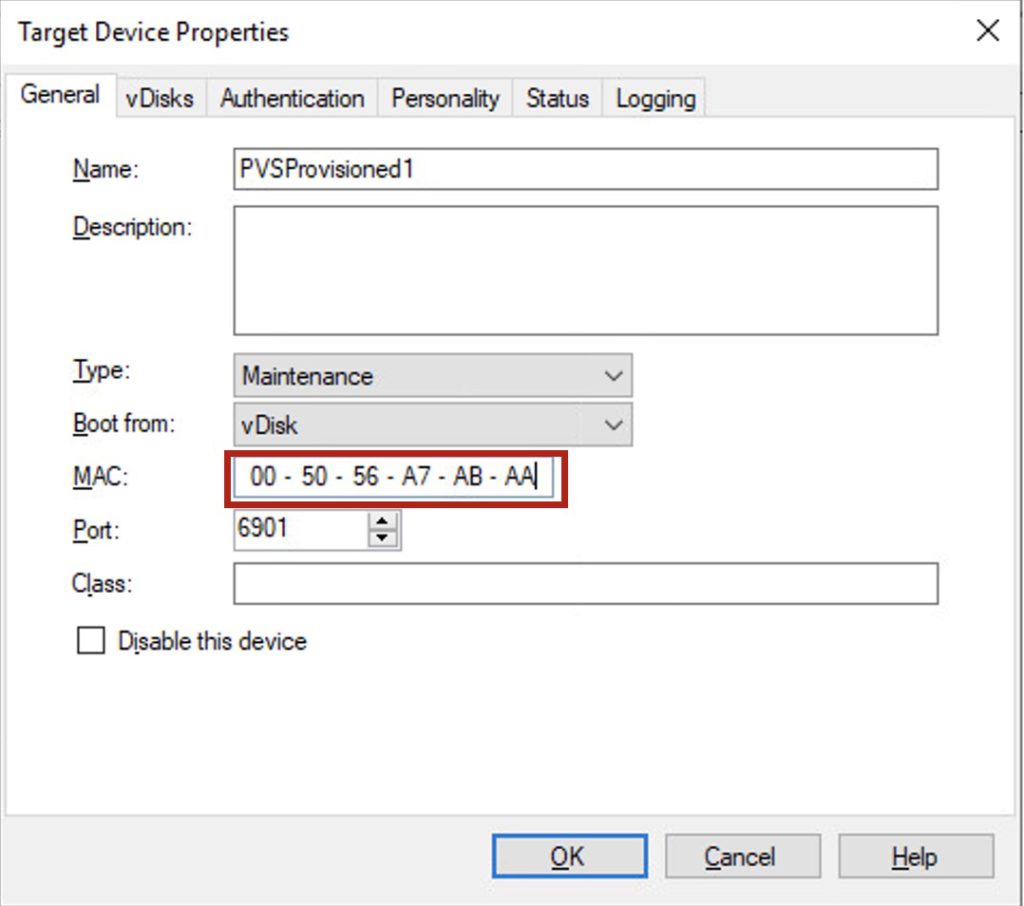
| 7 | Go to the PVS console and update the MAC address for the VM using the MAC address of the E1000 NIC.
|
| 8 | Boot the VM. |
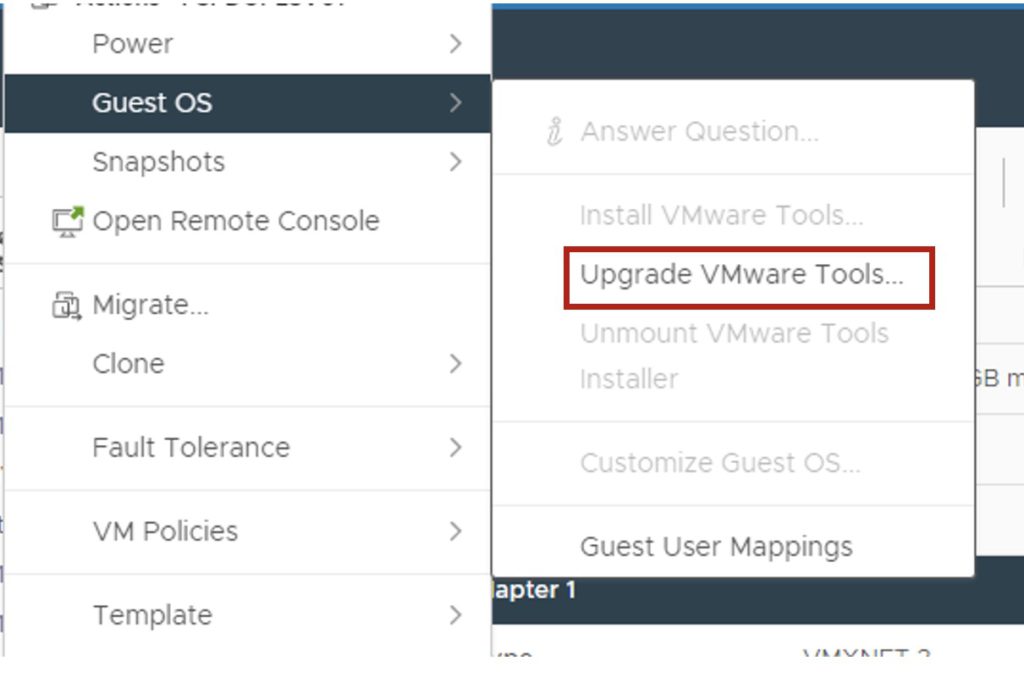
| 9 | Attach VMware tools ISO, then install. You can choose “Complete” or “Custom” option, but if you choose the Custom option make sure the VMXNET3 driver is selected.
|
| 10 | Let the install finish, and when it asks you to shut down the VM, select NO. |
| 11 | Go to the VMware vSphere client and attach VMXNet3 NIC (again, I left it as not connected for the same reason). 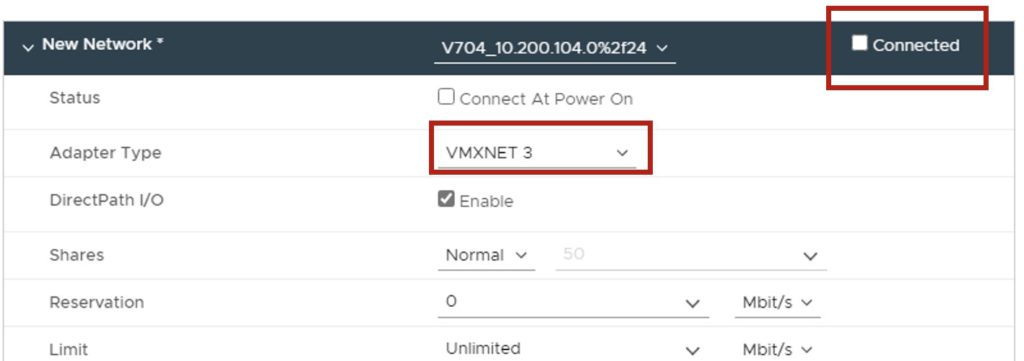 |
| 12 | Open your Device Manager and make sure the new driver is shown, you will need to enable “Show hidden devices”. |
| 13 | Shut down the VM. |
| 14 | At this point, I have removed ALL NICs from the VM, hit OK, and then added just VMXNET3. |
| 15 | On the PVS console, update the MAC for the maintenance VM.
|
| 16 | Boot the VM. |
| 17 | Once logged in, go to the device manager, enable “Show hidden devices” and remove E1000 NIC (it will show as ghosted NIC). |
| 18 | Run any sealing scripts (if you have them), then shut down the VM. |
| 19 | In the PVS console, promote the version to test or production, or if using a vDisk, make sure it is in Standard mode. |
Conclusion
Hope this helps your VMware tools update on your vDisk.


Awesome write up followed the steps everything worked as expected.
What are the steps to uninstall VMware tools from PVS vDisk? We are planning to migrate from VMware to XenServer, so want to know how to remove VMware tools before importing vDisk to XenCenter.
Hi Srini, we’d recommend checking out our Tech Zone article on the subject for the recommended steps. I would however, strongly recommend you build the image from scratch on XenServer for optimal performance and reduced potential for issues. This is a long-standing Citrix Consulting recommendation.
https://community.citrix.com/tech-zone/build/deployment-guides/vmware-to-xenserver-migration-guide
I’m able to successfully upgrade VMWare Tools using the E1000 NIC as long as the PVS Master Target Device is using BIOS firmware and the vDisk is using MBR partition. When using a target device that uses EFI firmware and Gpt partition it will not load the OS when using the E1000 NIC. Is there a workaround for this scenario?
I have exact the same problem. BIOS works fine, EFI not. Really looking forward for a solution here.