
Introduction
Citrix StoreFront has an extensible UI customization engine to allow Citrix admins to tune their Receiver for Web pages to meet legal, user experience, and support objectives. I have worked with numerous Ferroque and Citrix Consulting customers requiring customization of their StoreFront deployments over the years, or observed customizations they have done themselves, and have maintained some documentation of various configurations aligned to customer requirements.
There are a number of good resources online from Citrix and the Citrix users community and this guide is intended to complement those resources.
As time permits, this guide may be updated periodically.
This guide is organized into a number of customization areas as follows:
- Log On Page
- Post-Log On Page (loading page)
- Logged In Page
- Log Off Page
- Adding Server Identifier Name
- Links and Tools
- Other Notes and Observations
File Location
Most of the customization work will be done in the following location of the given StoreFront Store being customized. Files added or modified in this location will propagate when propagation is invoked from the primary StoreFront Server.
The files in which will be edited to create a custom StoreFront are located in:
C:\inetpub\wwwroot\Citrix\<STORE NAME>Web\custom
Log On Page
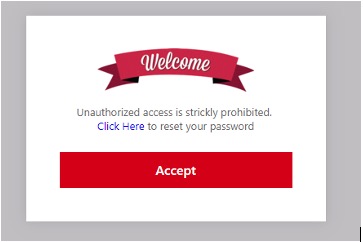
Create a custom log on disclaimer
Config File: Script.js
To create a custom log on disclaimer, open scripts.JS and add the following code. Images and gifs can be added to the popup box. Images that are larger than 500px X 500px will not fit. 300px X 300px is recommended. <br/> can be used to create line breaks in between sentences.
CTXS.Extensions.beforeLogon = function (callback) {
    doneClickThrough = true;
    CTXS.ExtensionAPI.showMessage({
        messageTitle: "<img src= custom/welcome.png>",
        messageText: "Unauthorized access is strictly prohibited. <br /> <a href='http://insertlinkhere.com/'>Click Here</a> to reset your password",
        okButtonText: "Accept",
        okAction: callback
    });
};
Style the custom logon disclaimer – Tile
Config File: style.css
.messageBoxTitle {
    color: #9BCD99;
    font-size: 22px;
    font-weight: normal;
    margin: 0 0 10px 0;
    text-align: center;
}
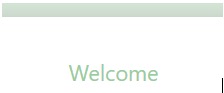
Style the custom logon disclaimer – Message Box
Config File: style.css
.messageBoxText {
    margin: 0;
    font-size: 13px;
    color: #666;
    text-align: center;
}
![]()
Style the button (Applies to all Citrix buttons)
Config File: style.css
.button.default {
    background-color: #FFC600;
    color: #FFFFFF;
    border: 1px solid white;
}

Change the background image
Config File: style.css
.web-screen
{
background-image: url(redwallpaper.jpg);
}
Change Logo
Config File: style.css
.is-hdpi .logon-logo-container{
    background-image: url('cloud.png');
    background-size: 214px 207px;
}
.logon-logo-container{
    background-image: url('cloud.png');
    background-size: 214px 207px;
}
![]()
Add Buttons to Footer
Config File: Script.js
$('.customAuthFooter').html("Ferroque Systems Technical Support <br />Excluding Holidays<br />Main Office: 416-777-7777<br />Support Email: support@ferroquesystems.com<br/> <a href='http://insertlinkhere.com/'><img src= custom/tips.png></a> <img src= custom/online.png> <img src= custom/remote.png> ");
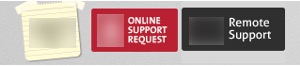
Style Logon Page Footer
Config File: style.css
.customAuthFooter {
font-size:14px;
font-weight: bold;
color: #CE0000;
text-align:left;
padding-left: 50px;
}
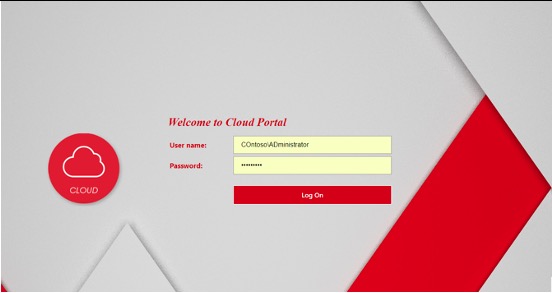
Add a Auth Header Over Logon Form
Config File: Script.js
$('.customAuthTop').html(" Welcome to Cloud Portal<br />");

Style Auth Header Over Logon Form
Config File: style.css
.customAuthTop {
font-size:28px;
color: #CE0000;
font-family: "OpenSans-Regular","citrixsans","HelveticaNeue-Light";
    text-align:center;
    padding-right: 260px;
    font-style: italic;
    font-weight: bold;
    margin-bottom: 11px;
    margin-top: 9px
}

Post Log On Page
Change the Receiver Loading Logo
Config File: style.css
By default, prior to the application enumeration, you will see a page with the Citrix Receiver and a spinning loading bar. To change the receiver image, add the image to the custom folder and modify style.css.
.loading-logo {
background-image: url(logo.png);
width:226px;
height:128px;
}
Logged In Page (Resources)
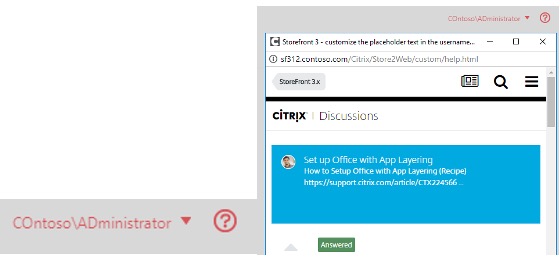
Add a Help Button (Pop-Up Window)
Config File: Script.js
The help button created will appear in the top right corner of the page. Create an html page for the pop-up window to be directed to. Save the page to C:\inetpub\wwwroot\Citrix\”STORE NAME”\custom. Apply the following code.
CTXS.ExtensionAPI.addHelpButton(
function popupCenter(url, title, w, h) {
w = 500;
h = 600;
var left = (screen.width/2)-(w/2);
var top = (screen.height/2)-(h/2);
var newWindow = window.open("custom/help.html", "XL Storefront Help", 'toolbar=no, location=no, directories=no, status=no, menubar=no, scrollbars=yes, resizable=no, copyhistory=no, width='+w+', height='+h+', top='+top+', left='+left);
return newWindow
}
);
Change the About Citrix Receiver Window
Config File: C:\inetpub\wwwroot\Citrix\<STORENAME>Web\receiver.html
<div class="popup aboutBox" id="aboutBoxPopup">
    <a href="#" id="aboutBoxCloseBtn" class="aboutBoxCloseBtn"></a>
    <div class="citrixReceiverLogoAboutBox"></div>
    <p class="thirdPartyNoticeHeader _ctxstxt_ThirdPartyNotices"></p>
    <a id="thirdPartyNoticesBtn" href="/ReceiverThirdPartyNotices.htm" class="thirdPartyNoticeLink _ctxstxt_ThirdPartyNoticesWeb" target="_blank"></a>
    <a id="html5ThirdPartyNoticesBtn" href="/clients/HTML5Client/src/ReceiverThirdPartyNotices.html" class="thirdPartyNoticeLink _ctxstxt_ThirdPartyNoticesHtml5" target="_blank"></a><br/>
    <span class="citrixCopyright _ctxstxt_CitrixCopyright"></span><br />
    <span class="_ctxstxt_AllRightsReserved"></span><br />
    <a href="https://www.ferroquesystems.com" class="citrixLink" target="_blank">www.ferroquesystems.com</a>
Config File: Strings.en
(function ($) {
    $.localization.customStringBundle("en", {
        AppStore: "BANANA IT MANAGEMENT",
        Example2: "This is another example"
    });
})(jQuery);

$('.customAuthTop').html("");

Add Border to Applications
Config File: style.css
.largeTiles .storeapp:last-of-type, .largeTiles .store-view .folder:last-of-type {
    width: 278.875px;
    margin-left: 50.875px;
    padding-right: 50.875px;
    padding-left: 0;
    margin-right: 0;
    border: 1px solid #CE0000;
}
Add Spacer to Application Icon and Name
Config File: style.css
.storeapp-icon {
    border-radius: 8px;
    display: block;
   margin-left: 11px;
   margin-top: 10px;
}
.storeapp .storeapp-name {
    color: #CE0000;
    margin-left: 11px;
    margin-top: 10px;
}

Add a Header on Page
Config File: Script.js
$('#customTop').html("Update: We are making changes to Storefront. Expected date of completion is May 25, 2018");

Style Header on Page
Config File: style.css
#customTop {
    text-align: center;
    background-color: #4AAFD6;
    color: #574f5b;
    font-size: 12px;
    padding-top: 10px;
    margin-bottom: -20px;
   font-weight: 700;
}
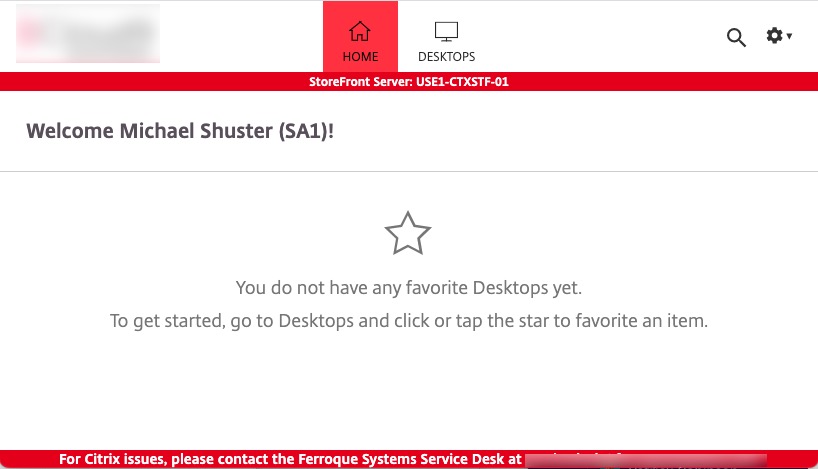
Add a Footer on Page
Config File: Script.js
$('#customBottom').html("For Citrix issues, please contact the Ferroque Systems Service Desk at abcdefg@ferroquesystems.com");
Style Header on Page
Config File: style.css
#customBottom {
background:#DE0303;
text-align: center;
color: #FFFFFF;
font-weight: 600;
font-size: 14px;
}
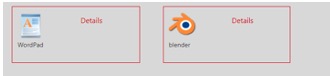
Dynamic Subscription Icons in StoreFront
Config File: Strings.en.js
Remove the word details Edit strings.en.JS
(function ($) {
$.localization.customStringBundle("en", {
Details: ""
});
})(jQuery);
Add custom icon files to the custom folder.
Config File: style.css
.storeapp-action-link{
background-image: url('img.png');
background-repeat: no-repeat;
background-position: center;
}
.added .storeapp-action-link{
background-image: url('img2.png');
}
![]()
Log Off Page
Create a custom log off message
Config File: Strings.en.js
To create a custom log off message, open strings.en.JS and add the following code.
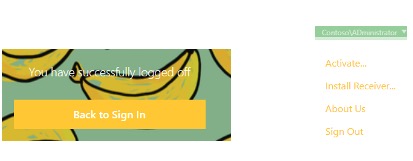
(function ($) {
    $.localization.customStringBundle("en", {
        YouHaveLoggedOff: "You have successfully logged off",
    LogOn: "Back to Sign In",
    LogOff: "Sign Out",
    About: "About Us",
    YouCannotUseAppsOrDesktops: "There are no apps available to you at this time.",
    });
})(jQuery);
Redirect log off to another page
Config File: Strings.en.js
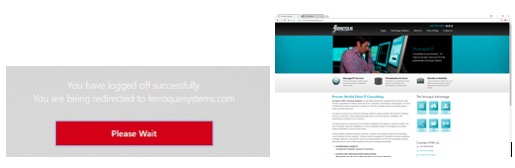
To redirect log off to a different website, open strings.en.JS and add the following code. <br/> can be used to create line breaks in between sentences.
(function ($) {
    $.localization.customStringBundle("en", {
        LogOn: "Please Wait",
        YouHaveLoggedOff:'You have logged off successfully.<br>You are being redirected to ferroquesystems.com<script type="text/javascript">window.location.replace("https://www.ferroquesystems.com");</script>'
    });
})(jQuery);
Add Server Identifier Name
There are two methods for this that Citrix has documented but others are possible.
Method 1: ASPX method alone
Method 2: IIS variable method with ASPX
The advantage of 2 over 1 is the ability to create a placeholder name and not the “real” server name if necessary for security reasons. Method 1 has fewer config steps but will call the server name as it is, and does not require further per-StoreFront server configs.
In the below example, we are using Method 1 and have injected the server name into the header.
As the Citrix documentation is a little old (StoreFront 2.5) I am including a functional means of using it in modern StoreFront and its custom folder structures. Something Michael Shuster worked on with Feng (Citrix blog author and all-around cool guy) circa StoreFront 3.0. Note similar logic could be used to extend some of the useful code in that original 2014 blog into newer versions of StoreFront as well.
Step 1: Add a dynamic script to the server
Within Windows Explorer on the primary StoreFront server, navigate to the following path:
[Drive Letter]:\inetpub\wwwroot\Citrix\[Store Name]Web\custom
In this folder, create a file called GetServerName.aspx and include the following content:
<%@ Page Language="C#" %>
<%@ Import Namespace="System" %>
<%=Environment.MachineName %>
Step 2: Append script.js with the server identifier retrieval code
$(document).ready(function() {
    $.ajax({
       url: 'custom/GetServerName.aspx',
        success: function(data) {
            var $markup = $('<div class="servername">'
                  + '<span class=/> StoreFront Server: ' + data
                  + '</div>');
            $('#customTop').html($markup).ctxsLocalize();
        }
    });
});
Step 3: Stylize the server identifier
Add the following to style.css
.servername {
font-size: 12px;
font-weight: 600;
color: #FFFFFF;
background:#DE0303;
padding: 2px 2px;
text-align: center;
}
If you want to customize the header add this as well to style.css:
#customTop{
background:#DE0303;
text-align: center;
color: #FFFFFF;
font-weight: 600;
font-size: 14px;
}
Step 4: Propagate your changes
Navigate to the Server Group tab and click Propagate Changes.
Links and Tools
Resize Images
http://resizeimage.net/ – All image types
https://ezgif.com/resize – Animated gifs
Colour Matching
https://developer.mozilla.org/en-US/docs/Web/CSS/CSS_Colors/Color_picker_tool – Find colour codes
https://html-color-codes.info/colors-from-image/ – Find colour of image
Other Notes/Observations
Embed an image where text is supposed to be.
<img src= custom/unismall.gif>


i remember .. the older days there were customization to have userID, Password and RSA Pin+token on the same page. do you know/ remember how. Please share