Introduction
This article shows the basic features about how to use the REST API for Citrix appliances known as NITRO. Some Citrix appliances such as the ADC, SDX, and ADM have a REST API interface called NITRO which allows for another facility to gather information or configure entities.
Now this interface allows for HTTP/S communication between a client and the NITRO web service with API calls. There are also SDKs such as python, .NET or Java which can be used to accomplish the same tasks.
The typical NITRO request sequence:
- Client sends REST request message to the NITRO web service
- NITRO web service processes the REST request message
- NITRO web service returns a REST response message
My (awful) attempt at teaching the API
This section showcases a very simplified way to complete some task using a HTTP request and the corresponding fulfillment completed through the listening server.
This lab ADC instance as well as almost every latest ADC build has python 2.7 available so why not create an insecure web server on this hardened security appliance and have it listen on a fairly well-known port.
I’ll begin by starting the server to make it listen on the NSIP 10.200.100.103 on port 8080.
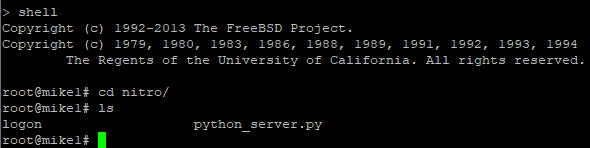
Python 2.7 has built-in libraries available so why not use them. This simple web server listens for the GET request and extracts the path data to accomplish a task.
This quick code does the following:
- Listens on 10.200.100.103:8080 for GET requests
- Gets the path and does the following
- If /unlock is found, then it unlocks the NITRO API account called nitro_ansible
- If /lock is found, then it locked the NITRO API account called nitro_ansible
- If any other path is found, it flaps the LBVS named doNotDisable to trigger 6 events for the monitoring appliance, then sleeps for 5 second

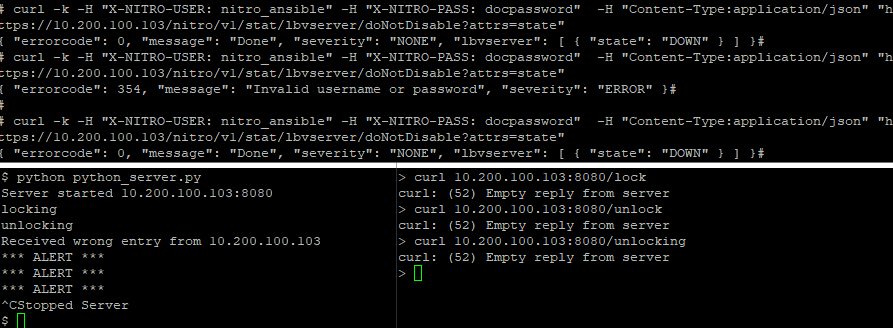
We can see that there is no response from the server for any request, but that’s not the point. Rather than printing out a status code on the client end, the server prints out locking or unlocking whenever the correct path is found in the incoming request.
We can see below that when the nitro_ansible user is locked, the status of the LBVS cannot be retrieved using curl, however, when unlocked it shows the server is DOWN.
The command curl was used in a Linux box against the URL https://10.200.100.103/nitro/v1/stat/lbvserver/doNotDisable?attrs=state which is the path to gather this information and also filter based on a key.
We showed the ‘GET’ request, however, there are other HTTP methods available with the NITRO API which are
- GET – Retrieve data
- POST – Create
- PUT – Update
- DELETE – Delete
The information above is enough to get through the tutorial for beginners, however later on you’ll find that not all API’s handle these methods the same.
Create an API user
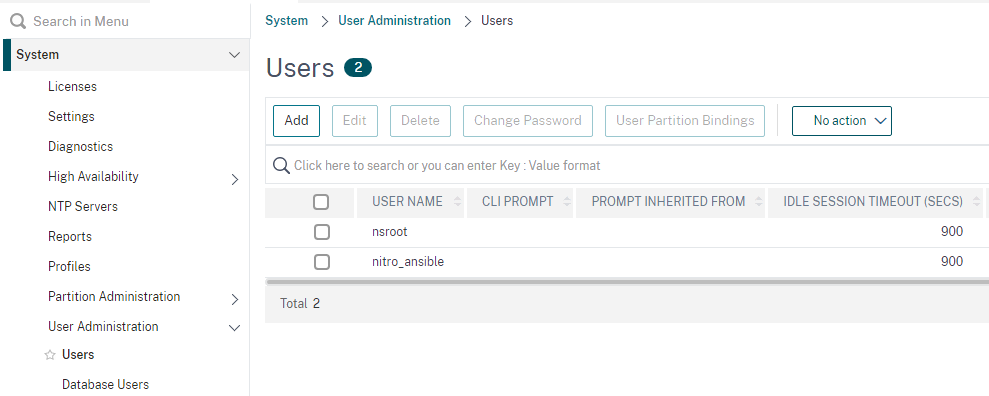
Let’s begin by creating a user specifically for API access. The nsroot account can be used however should never be used for this.
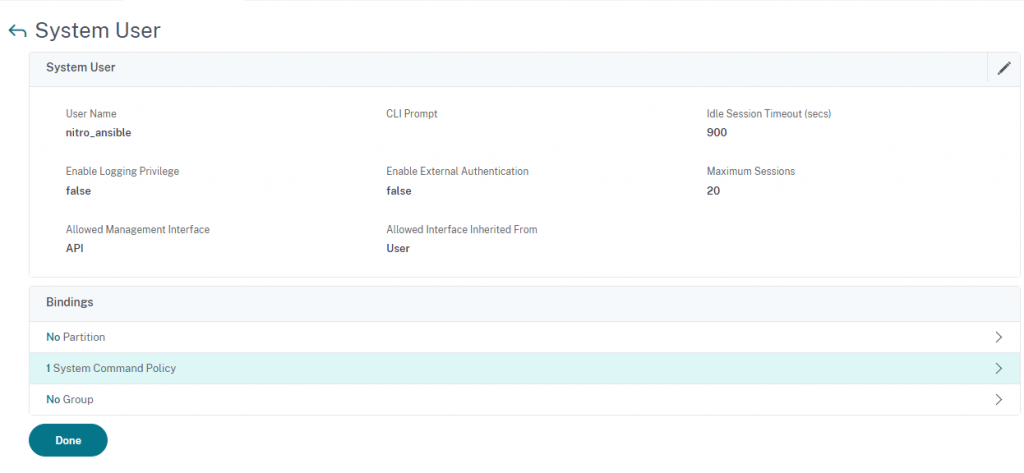
Using the GUI, System > User Administration > Users create a new user.
Fill in the information just like a normal user however the allowed management interface should be API only.
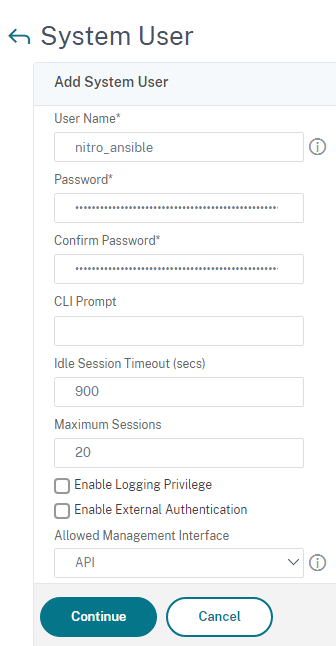
Optionally a configure command policy can be bound which limits the reach that the API user can operate on.
The command below was built using the command spec editor however what it does is limits the nitro_ansible user to ONLY setting system users and ONLY showing the results. This limitation works great with the example python server above however blocks every other operation.
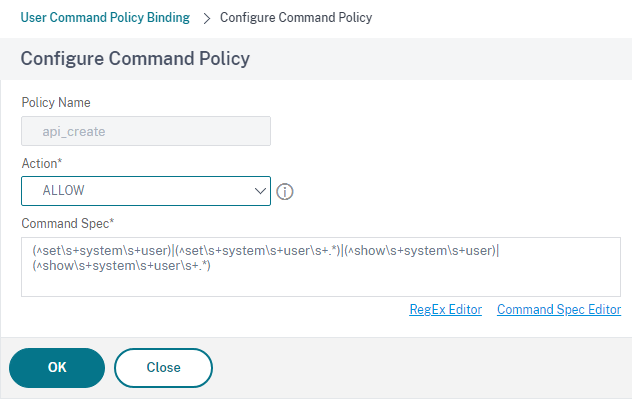
I’m going to remove this command policy moving forward.
NITRO API Overview
The general format is as below. Consult the product documentation for a more exact format however, this is for the ADC.
For Configuration : https://<NSIP>/nitro/v1/config/<resource_type>
For Statistics : https://<NSIP>/nitro/v1/stat/<resource_type>
The NSIP of a test lab is 10.200.100.103 so we can use that to either configure objects or gather information about them.
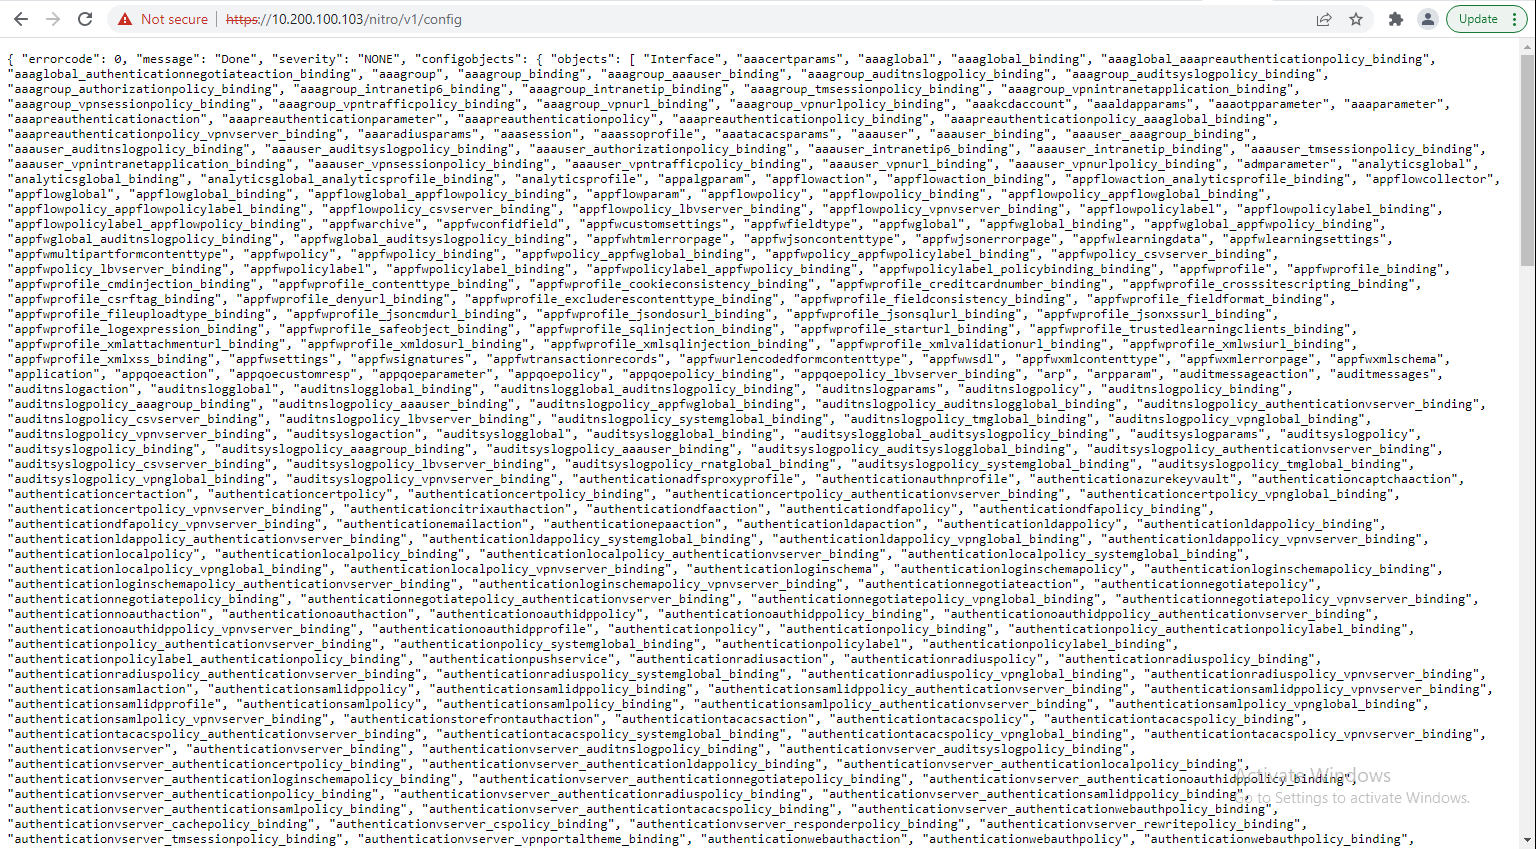
List of objects that can be parsed for statistics:

List of objects that can be configured:
A brief tutorial about basic operations can be found here. It’s recommended to complete these tasks to get a feel for the NITRO API, however, continuing with this tutorial I’ll assume that you have at least a basic understanding of JSON and other APIs.
curl
I’ll be using curl which is built into linux and mac machines.
More information about the curl switches used in this tutorial can be found with curl –help however this is a quick overview of what I used
- -H pass custom header to the server
- -v add verbosity
- -vvv even more verbose
- -k allow insecure connections when using SSL
- -d HTTP POST data, use @filename when referencing a file with either relative or absolute pathing
Enable Features
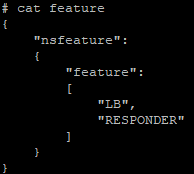
The basic structure of any NITRO API command is to pass the headers needed to a URL and a data file with all the request information the API will be looking for. For example, we want to enable 2 features, so I created a file called feature and referenced it using the curl command.
View the feature we want to be enabled:
{
    "nsfeature":
    {
        "feature":
        [
            "LB",
            "RESPONDER"
        ]
    }
}
Enable the features using the “action=enable”
curl -k -H "X-NITRO-USER: nitro_ansible" -H "X-NITRO-PASS: docpassword" -H "Content-Type:application/json" "https://10.200.100.103/nitro/v1/config/nsfeature?action=enable" -d @feature
![]()
View the list of features enabled. Enclosed in square brackets on the first line is all the features enabled:
curl -k -H "X-NITRO-USER: nitro_ansible" -H "X-NITRO-PASS: docpassword" -H "Content-Type:application/json" "https://10.200.100.103/nitro/v1/config/nsfeature"

Save the Config
It’s not always necessary to save a file for every request payload however it makes it easier for pretty much every situation. In the command below we can just paste the contents in line with the command after the -d switch.
curl -k -H "X-NITRO-USER: nitro_ansible" -H "X-NITRO-PASS: docpassword" -H "Content-Type:application/json" "https://10.200.100.103/nitro/v1/config/nsconfig?action=save" -d '{"nsconfig":{}}'
![]()
Create an LBVS
This link does a good job at explaining how to do some additional operations.
Let’s skip the single operations and throw everything together into one.
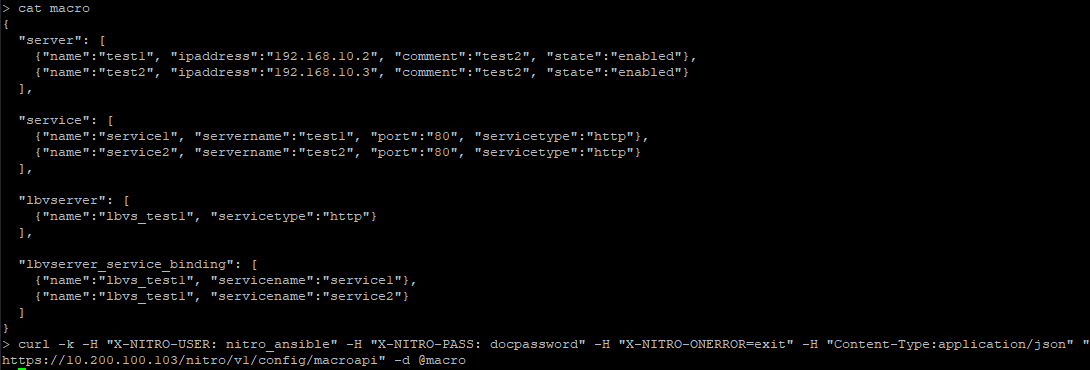
The data passed below creates 2 servers, 2 services, 1 load balancer and binds the services to that load balancer. The NITRO API parser is pretty strict with taking in any data file so make sure it is formatted correctly otherwise none of these operations will work.
{
  "server": [
    {"name":"test1", "ipaddress":"192.168.10.2", "comment":"test2", "state":"enabled"},
    {"name":"test2", "ipaddress":"192.168.10.3", "comment":"test2", "state":"enabled"}
  ],

  "service": [
    {"name":"service1", "servername":"test1", "port":"80", "servicetype":"http"},
    {"name":"service2", "servername":"test2", "port":"80", "servicetype":"http"}
  ],

  "lbvserver": [
    {"name":"lbvs_test1", "servicetype":"http"}
  ],

  "lbvserver_service_binding": [
    {"name":"lbvs_test1", "servicename":"service1"},
    {"name":"lbvs_test1", "servicename":"service2"}
  ]
}
curl -k -H "X-NITRO-USER: nitro_ansible" -H "X-NITRO-PASS: docpassword" -H "X-NITRO-ONERROR=exit" -H "Content-Type:application/json" "https://10.200.100.103/nitro/v1/config/macroapi" -d @macro
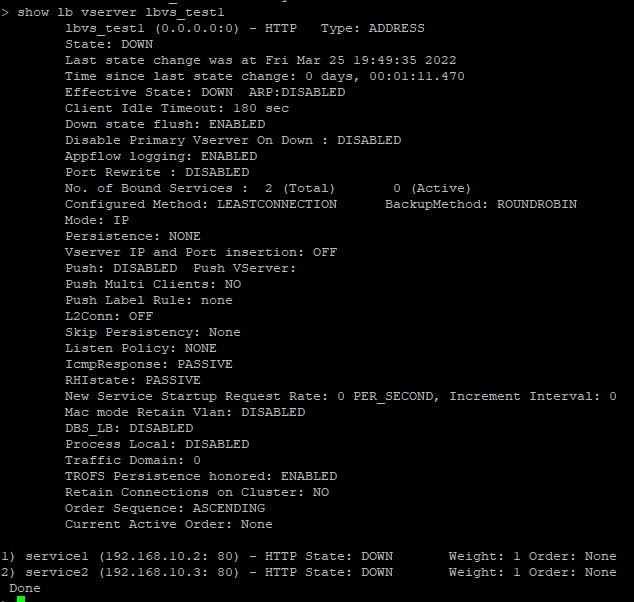
We see that the LBVS server was created with services bound to it. It’s currently DOWN since none of these IP addresses exist, however http://10.200.100.103/nitro/v1/config/lbvserver if you check the config applied through NITRO, you’ll find additional parameters that were given default values.
This article is great for describing multiple operations for API calls against the /nitro/v1/config/macroapi
https://support.citrix.com/article/CTX219929
New VPX instance on an SDX
Let’s move over to the time-consuming items such as creating instances on an SDX.
Let’s start out by viewing the 2 instances currently running using the filter “?attrs=name”.
curl -k -H "X-NITRO-USER: nitro_ansible" -H "X-NITRO-PASS: docpassword" -H "Content-Type:application/vnd.com.citrix.sdx.ns+json" "https://10.100.100.171/nitro/v2/config/ns?attrs=name"
![]()
The data here is trying to be as generic as possible however it is enough to be readable and actually useful. The documentation Citrix provides is great for single instances such as 10/1 but it would be recommended to not run a single link in production without any form of trunking.
The instance below is internally managed, has LA/1 as the data interface allowing vlan 701, and a management interface LA/1 with vlan 701. The profile is called “default_updates” which provides communication between the SDX and the VPX instance.
This instance is fairly basic for a lab however can be tweaked quite easily to adapt to almost every use case such as swapping the license to “Enterprise” or adding crypto units with the key “acu”.
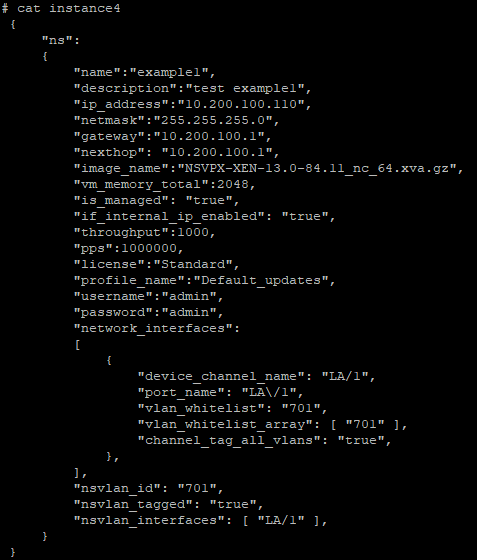
    "ns":
    {
        "name":"example1",
        "description":"test example1",
        "ip_address":"10.200.100.110",
        "netmask":"255.255.255.0",
        "gateway":"10.200.100.1",
        "nexthop": "10.200.100.1",
        "image_name":"NSVPX-XEN-13.0-84.11_nc_64.xva.gz",
        "vm_memory_total":2048,
        "is_managed": "true",
        "if_internal_ip_enabled": "true",
        "throughput":1000,
        "pps":1000000,
        "license":"Standard",
        "profile_name":"Default_updates",
        "username":"admin",
        "password":"admin",
        "network_interfaces":
        [
            {
                "device_channel_name": "LA/1",
                "port_name": "LA\/1",
                "vlan_whitelist": "701",
                "vlan_whitelist_array": [ "701" ],
                "channel_tag_all_vlans": "true",
            },
        ],
        "nsvlan_id": "701",
        "nsvlan_tagged": "true",
        "nsvlan_interfaces": [ "LA/1" ],
    }
}
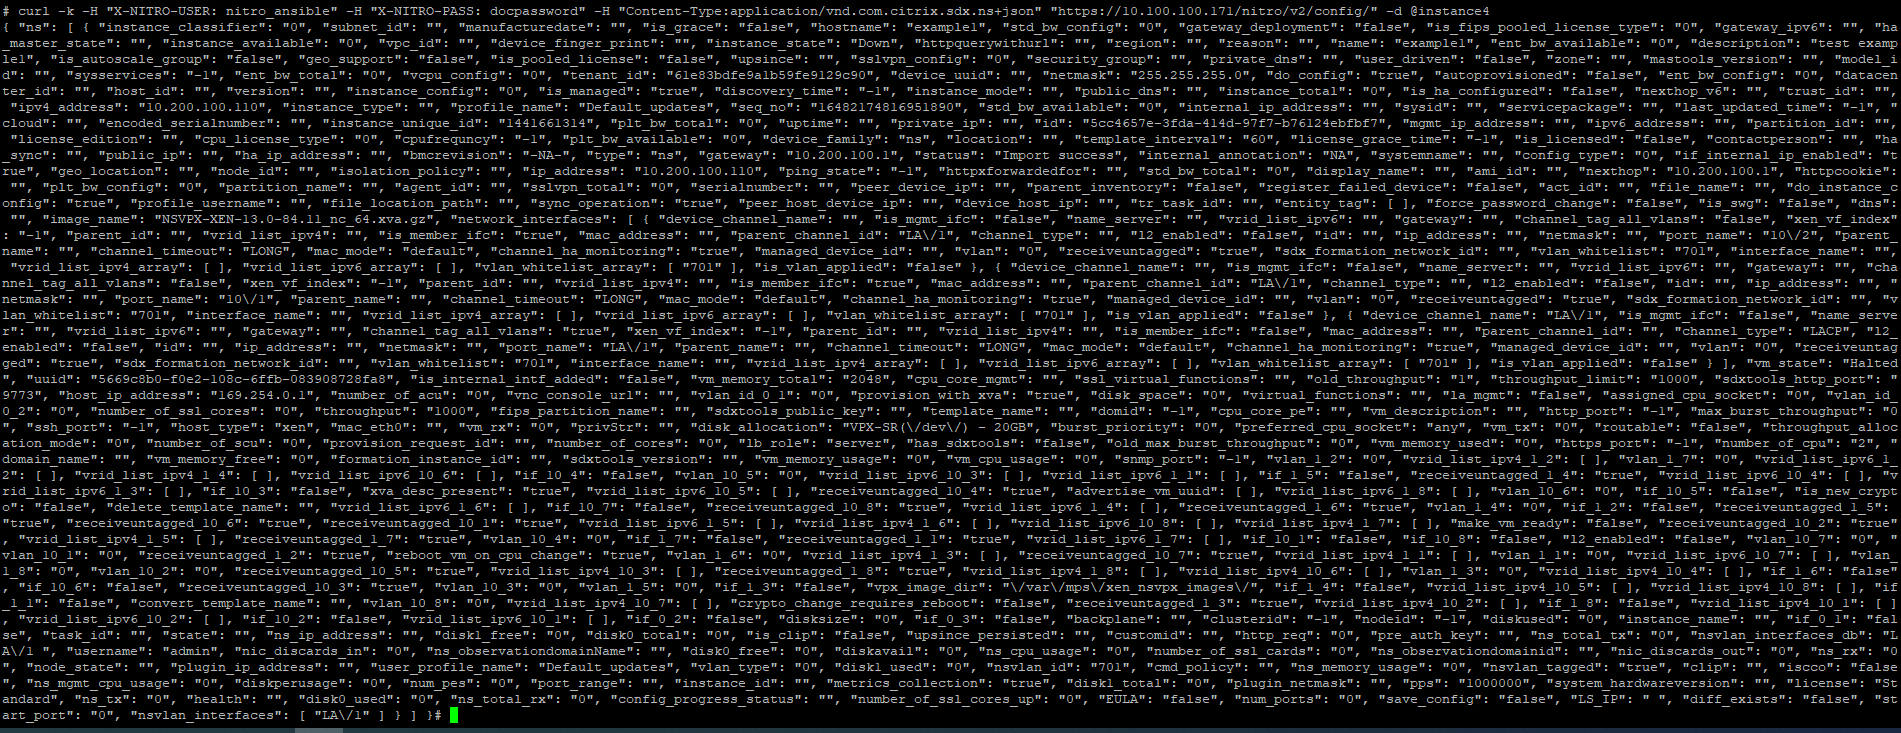
The data is pushed to the REST API and a really long string is returned back after about 40 seconds.
curl -k -H "X-NITRO-USER: nitro_ansible" -H "X-NITRO-PASS: docpassword" -H "Content-Type:application/vnd.com.citrix.sdx.ns+json" "https://10.100.100.171/nitro/v2/config/" -d @instance4
Let’s confirm now that the new instance is recognized and given another minute or so, the instance comes online and is ready to login.
curl -k -H "X-NITRO-USER: nitro_ansible" -H "X-NITRO-PASS: docpassword" -H "Content-Type:application/vnd.com.citrix.sdx.ns+json" "https://10.100.100.171/nitro/v2/config/ns?attrs=name"
![]()

Troubleshooting
Trying to troubleshoot this API was painful. Meaningless error codes, lots of trial and error with equally meaningless error messages.
I’d recommend viewing the documentation as a starting point however the real progress will come from deploying a very basic resource then applying the changes you want against that resource and recording the differences through the config API resources such as the LBVS example above.
Now that the basics are covered, the next step to actually making this REST API more usable is to use the SDKs.