Introduction and Background
With the deprecation of classic policies in Citrix ADC 13.1, nFactor is becoming more popular to chain multiple factors together and extend the capabilities of the Citrix Gateway and AAA-TM login process beyond conventional username/credentials. One example of this is a client wanting a EULA as a factor and auto-accepting it after 3 seconds (I can’t comment on the legal ramifications of this). That being said, the capability could be extended to other types of factors where an administrator may wish to only present a notification to a user for a brief period of time before disappearing.
This tutorial will go over adding a EULA as a factor that must be accepted.
Steps to Success (In nFactor and in Life)
Step 1 – Adding the EULA
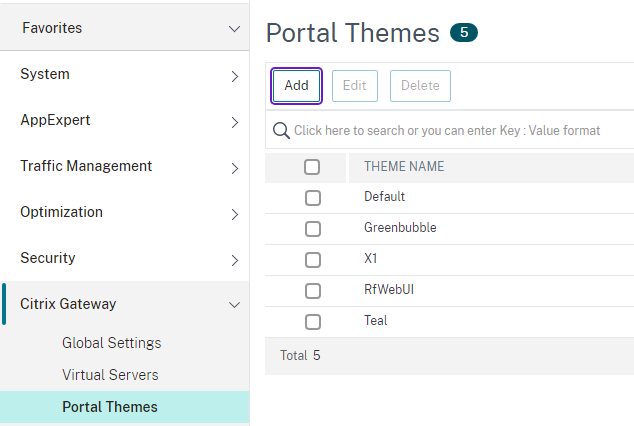
The technique for the auto-disappearing/auto-accepting EULA uses the built-in custom labels component of the Citrix portal theme engine available only in the RfWebUI-based themes which use more or less the same theme customization and extensibility engine found in Citrix StoreFront. Also be aware that at present, all other themes including Default, Green Bubbles, and X1 are now considered deprecated by Citrix. This example is using the RfWebUI and has a theme created off that called “Teal”. To be clear, do not use an X1 or other type of theme, you must use a RfWebUI-based theme.
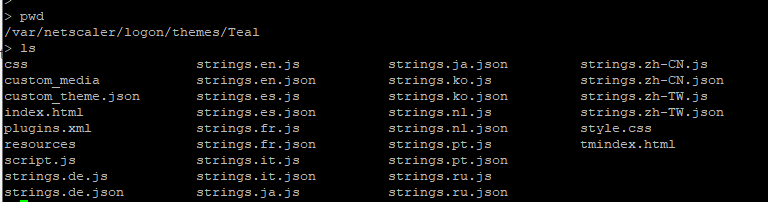
After creating the theme, a directory inside the /var/netscaler/logon/themes location is created after the theme name. For this example, I used the name “Teal”. Inside the /var/netscaler/logon/themes/Teal/ directory is a file called script.js which we will write into to auto accept the EULA.
Inside the script.js file, let’s add the code that’s needed to auto-accept the EULA. The components to make that happen are a login schema (XML) to present the page and the script mentioned before.
The script we will create makes an empty div container and has a jQuery function that waits 3 seconds once the web page has been loaded and then clicks the button to proceed to the next page. You can of course, alter the timing in the script to suit your needs.
This document was used as a reference. Additional Javascript that would work had to be placed in this sort of format placed inside the getCredentialTypeMarkup function. Once the document is ready, the DOM is available to modify so elements can be added or even windows opened.
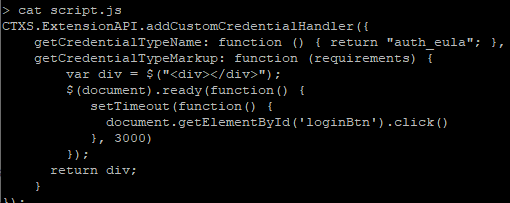
CTXS.ExtensionAPI.addCustomCredentialHandler({
    getCredentialTypeName: function () { return "auth_eula"; },
    getCredentialTypeMarkup: function (requirements) {
        var div = $("<div></div>");
        $(document).ready(function() {
           setTimeout(function() {
             document.getElementById('loginBtn').click()
           }, 3000)
        });
      return div;
    }
});
The XML type we will see later called “auth_eula” works by returning a div element otherwise an error appears in the browser console and the page is prevented from loading.
Next up is the login schema which is the view of what the user sees. This location is in /nsconfig/loginschema/LoginSchema/.
I copied over the existing Eula.xml and added an additional Requirement element. This Requirement has a Credential element which we added earlier in the script with .addCustomCredentialHandler.
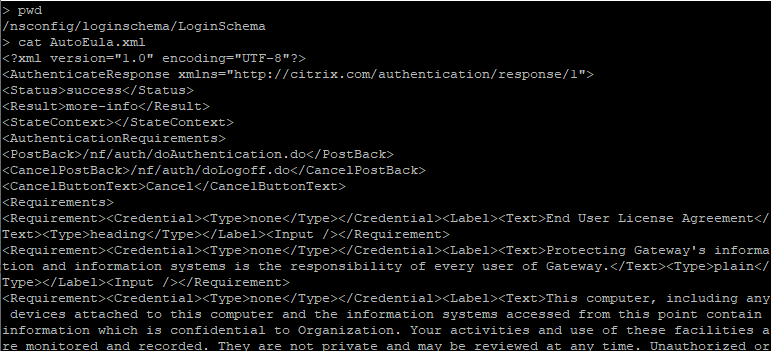
Login schema XML file to save as AutoEula.XML. Alter text to suit your needs.
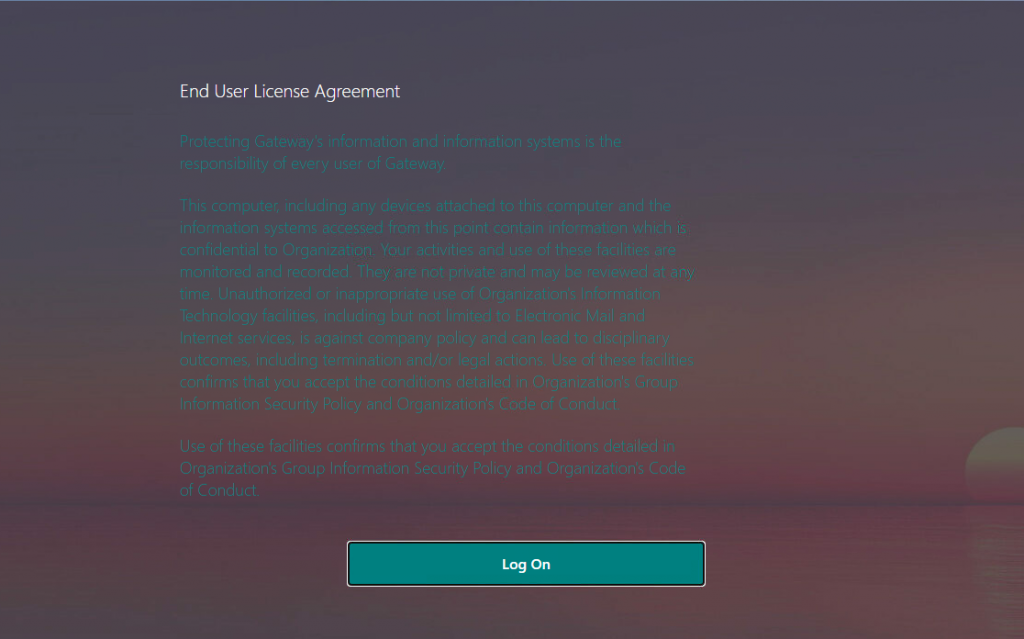
<?xml version="1.0" encoding="UTF-8"?>
<AuthenticateResponse xmlns="http://citrix.com/authentication/response/1">
<Status>success</Status>
<Result>more-info</Result>
<StateContext></StateContext>
<AuthenticationRequirements>
<PostBack>/nf/auth/doAuthentication.do</PostBack>
<CancelPostBack>/nf/auth/doLogoff.do</CancelPostBack>
<CancelButtonText>Cancel</CancelButtonText>
<Requirements>
<Requirement><Credential><Type>none</Type></Credential><Label><Text>End User License Agreement</Text><Type>heading</Type></Label><Input /></Requirement>
<Requirement><Credential><Type>none</Type></Credential><Label><Text>Protecting Gateway's information and information systems is the responsibility of every user of Gateway.</Text><Type>plain</Type></Label><Input /></Requirement>
<Requirement><Credential><Type>none</Type></Credential><Label><Text>This computer, including any devices attached to this computer and the information systems accessed from this point contain information which is confidential to Organization. Your activities and use of these facilities are monitored and recorded. They are not private and may be reviewed at any time. Unauthorized or inappropriate use of Organization's Information Technology facilities, including but not limited to Electronic Mail and Internet services, is against company policy and can lead to disciplinary outcomes, including termination and/or legal actions. Use of these facilities confirms that you accept the conditions detailed in Organization's Group Information Security Policy and Organization's Code of Conduct.</Text><Type>plain</Type></Label><Input /></Requirement>
<Requirement><Credential><Type>none</Type></Credential><Label><Text>Use of these facilities confirms that you accept the conditions detailed in Organization's Group Information Security Policy and Organization's Code of Conduct.</Text><Type>plain</Type></Label><Input /></Requirement>
<Requirement><Credential><ID>auth_eula</ID><Type>auth_eula</Type></Credential><Label><Text></Text><Type>Plain</Type></Label></Requirement>
<Requirement><Credential><ID>loginBtn</ID><Type>none</Type></Credential><Label><Type>none</Type></Label><Input><Button>Log On</Button></Input></Requirement>
</Requirements>
</AuthenticationRequirements>
</AuthenticateResponse>
Step 2 – Adding the nFactor Flows
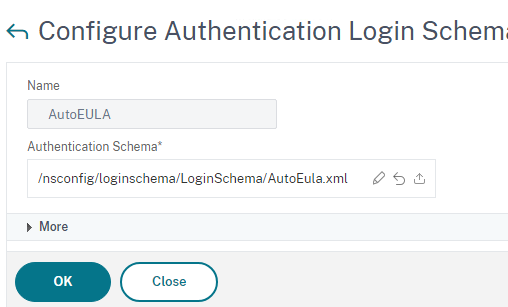
With the 2 pre-requisites in place, lets create the Login Schema profile. Head over to Security > AAA – Application Traffic > Login Schema > Profiles and add a new profile pointing to the newly created XML file.
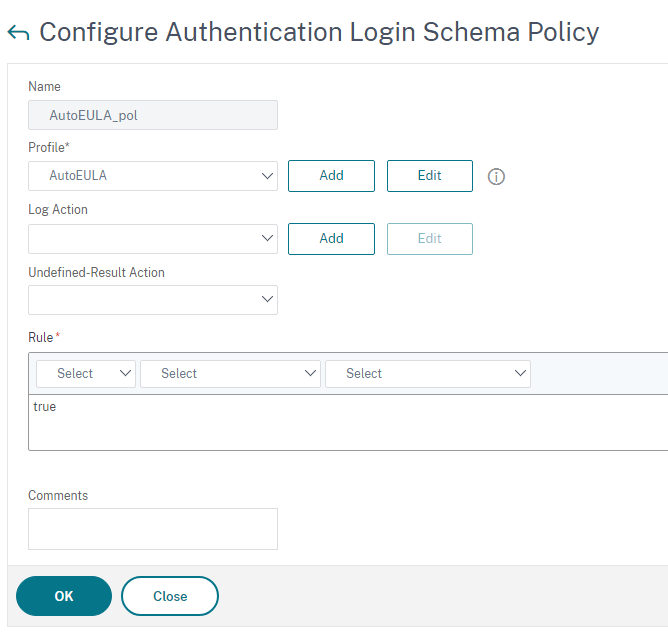
Now add a Login Schema policy with a ‘true’ expression so it is always applied.
In Security > AAA – Application Traffic > nFactor Visualizer > nFactor Flows, we will add a new flow.
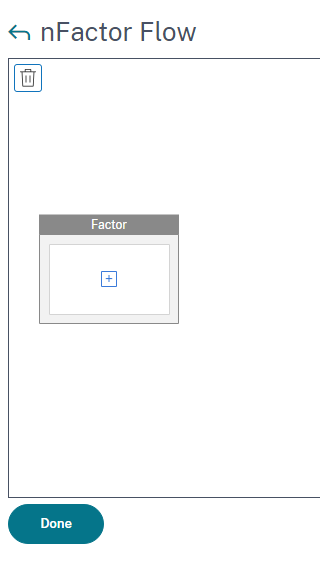
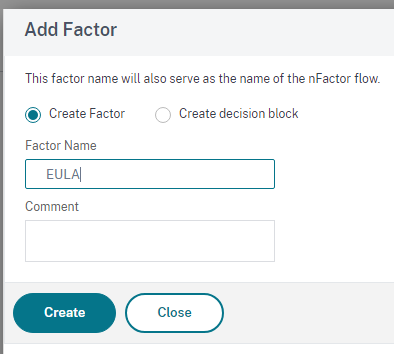
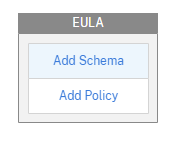
The new factor needs a Schema and a policy both of which we created earlier. Select the AutoEULA schema.

The eula_nfactor policy is just a true expression with the action of NO_AUTHN.
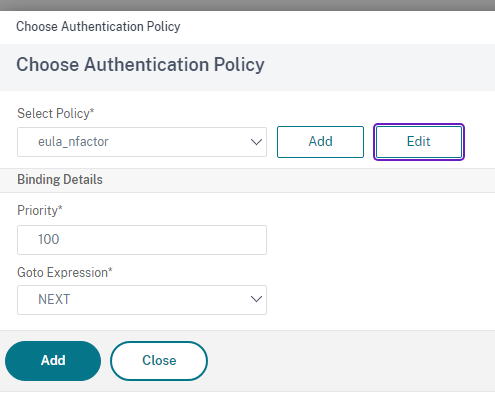
Bind the policy with the default priority.
With that, I’ll add LDAP back into the flow as the last factor before a user can be logged in (add whatever your next auth factor may be of course in lieu).
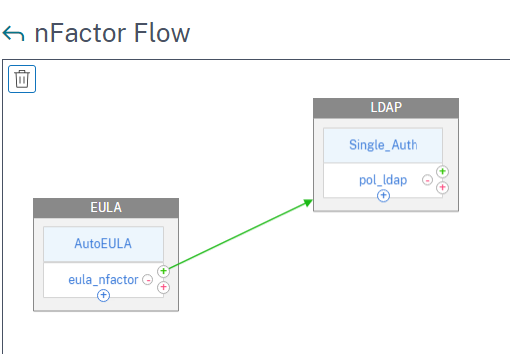
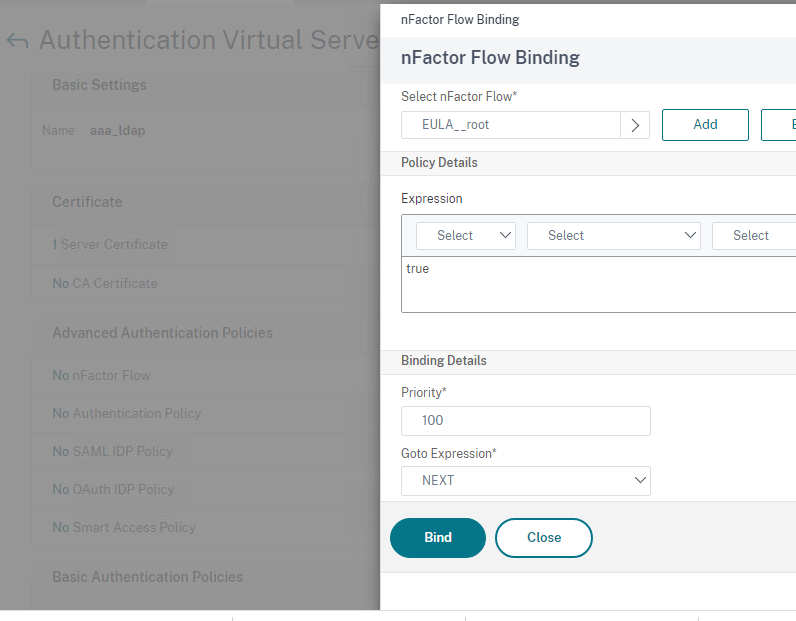
Assign the nFactor to an authentication vServer. In our simple demo here it will be the first factor. But you may wish to create a policy label and bind the EULA factor to that, and then add this auto-accept EULA action after a preceding factor as its next factor. We’re keeping it simple for demo purposes with just EULA > LDAP.
Step 3 – Testing
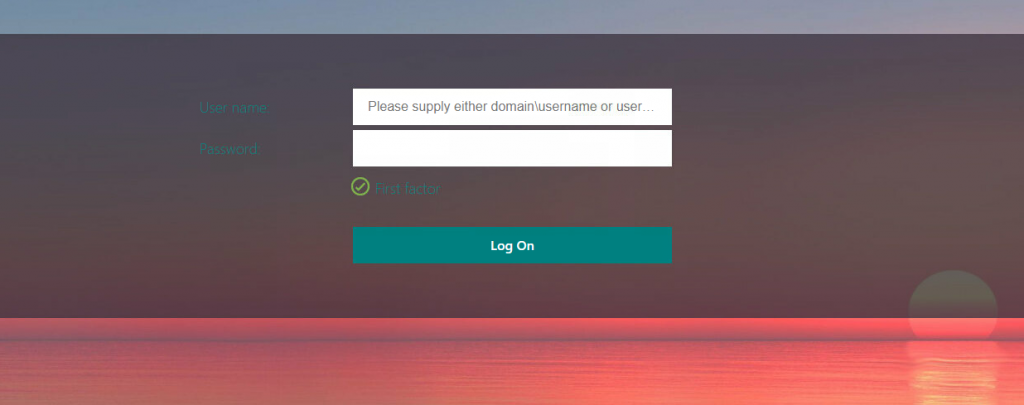
The only way a user can log in is if they can pass all the factors. Browsing the Citrix Gateway URL that the Authentication vServer was attached to using an authentication profile, the EULA shows up which has a 3-second delay before that is automatically accepted.
The last factor is LDAPS protecting our precious applications. Or maybe not so precious being it’s only single-factor. We won’t tell them to avoid offending them.
Conclusion
Hopefully, this helped someone out trying to add custom XML elements. Documentation is limited and it took a lot of frustration to learn that changes in the custom XML files and script.js files are not immediate and may require rebinding to take effect. Special thanks to Allen Perry and Michael Shuster here at Ferroque for their guidance in this task.