Part 2 – The Web Console
On April 18, 2023, IGEL released COSMOS, the new version of its thin client OS, also known as IGEL 12. It has also released a new version of its Universal Management Server, UMS 12.
You can find our Part 1 article on initial installation here.
With the introduction of COSMOS, IGEL is starting a transition from the Java console to a pure web implementation. More than just a GUI on the Java console, the Web console is now required to configure IGEL OS 12 devices.
Registering the Server
IGEL OS 12 is based on modular apps. Before we can create profiles, we’ll need to download the apps. But before we do that, we need to register the UMS 12 server with IGEL.
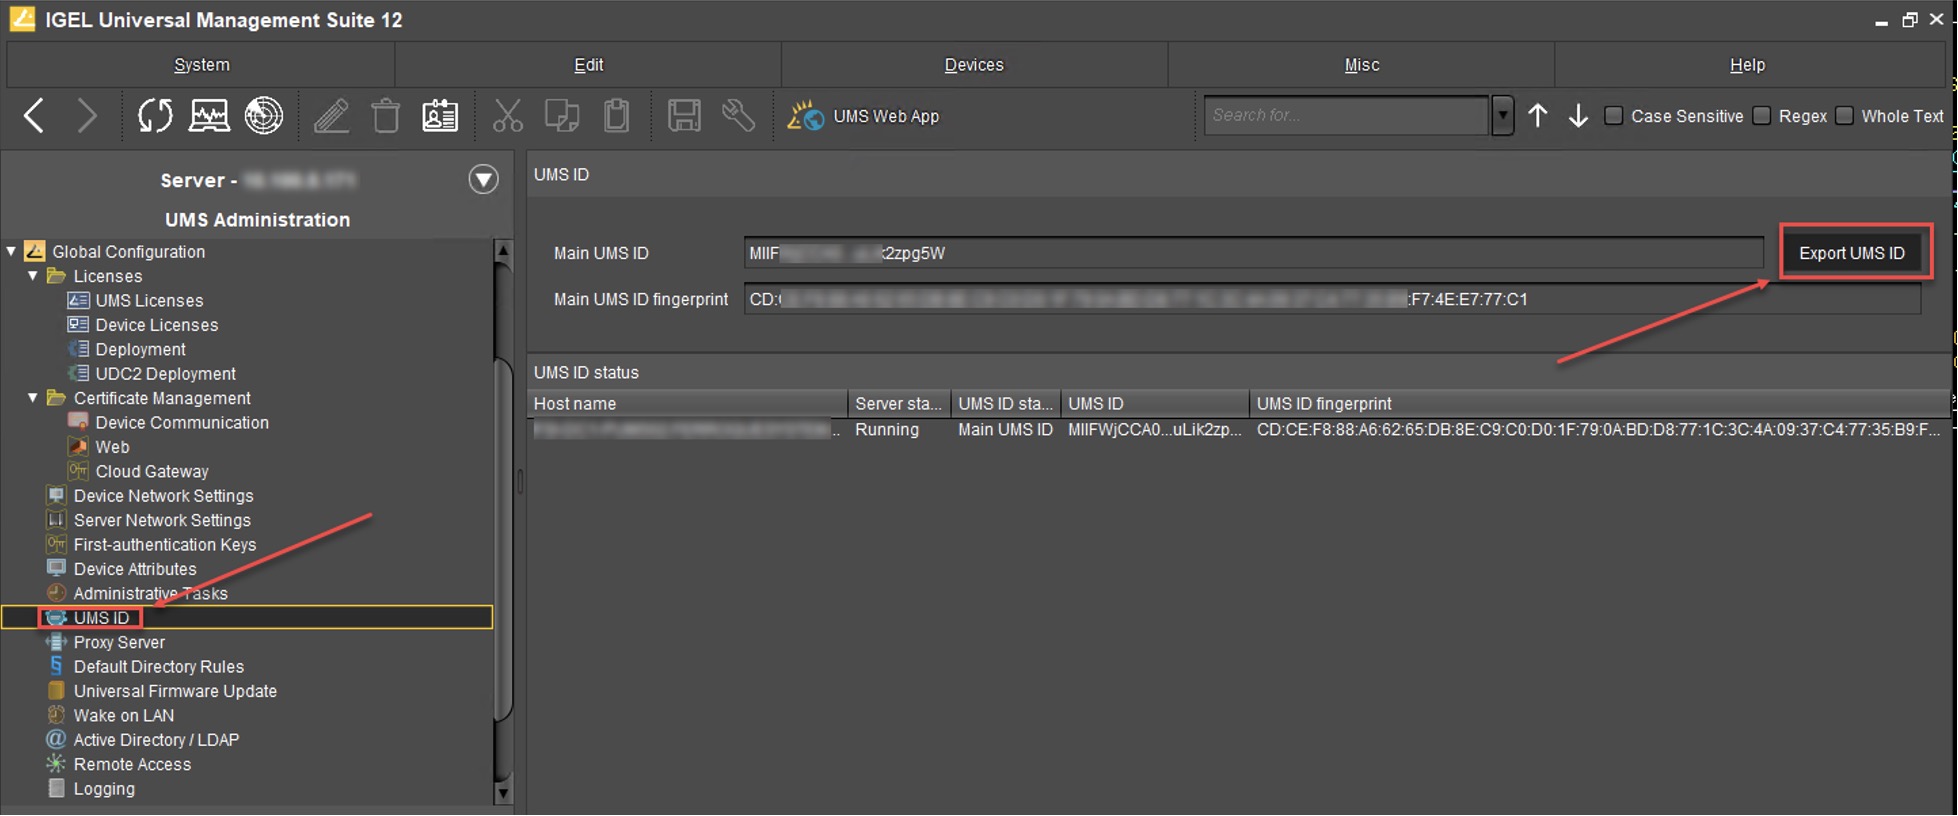
Go to the Java console. Under UMS administration, go to UMS ID. In the upper right corner, click on Export UMS ID.
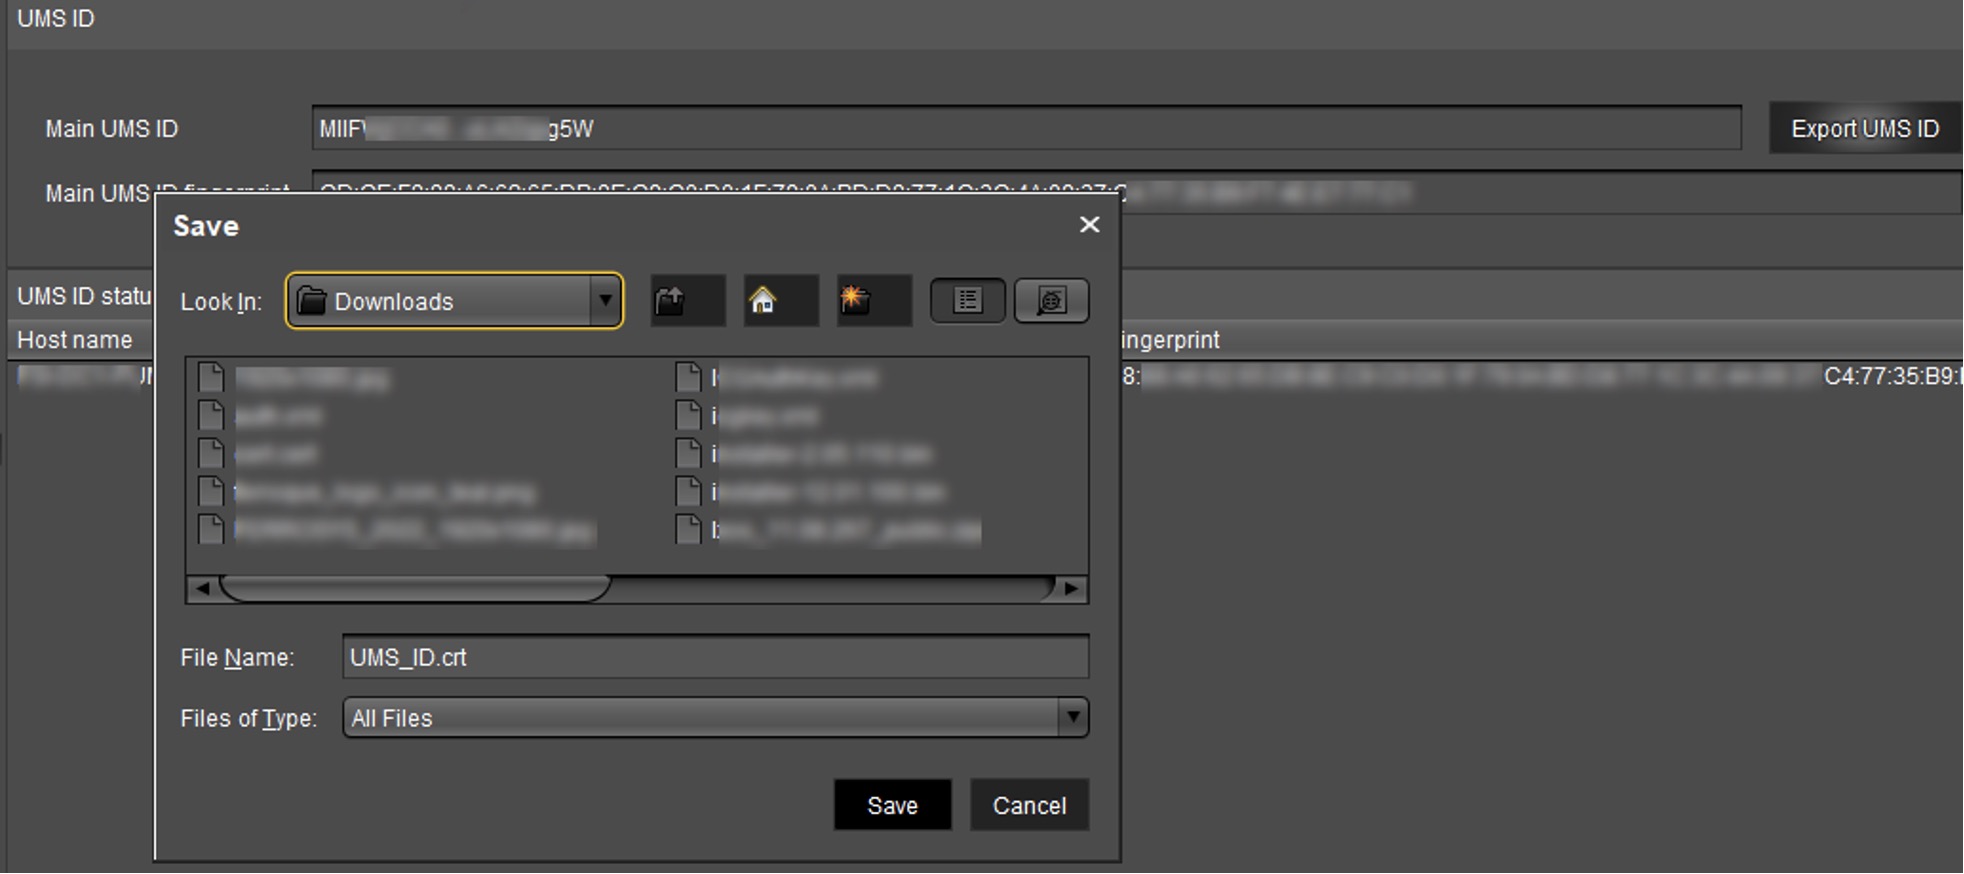
Select a location and save the file.
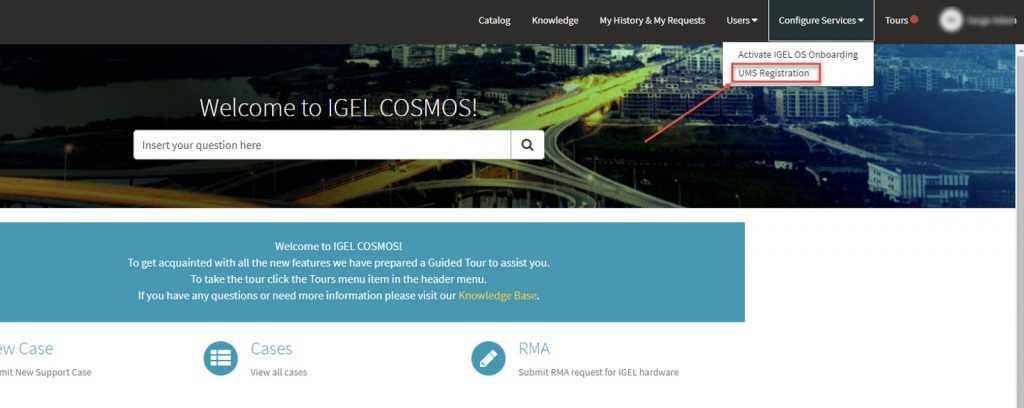
Open your browser and go to https://cosmos.igel.com. Login with your IGEL ID. In the Configure Services menu, select UMS Registration.
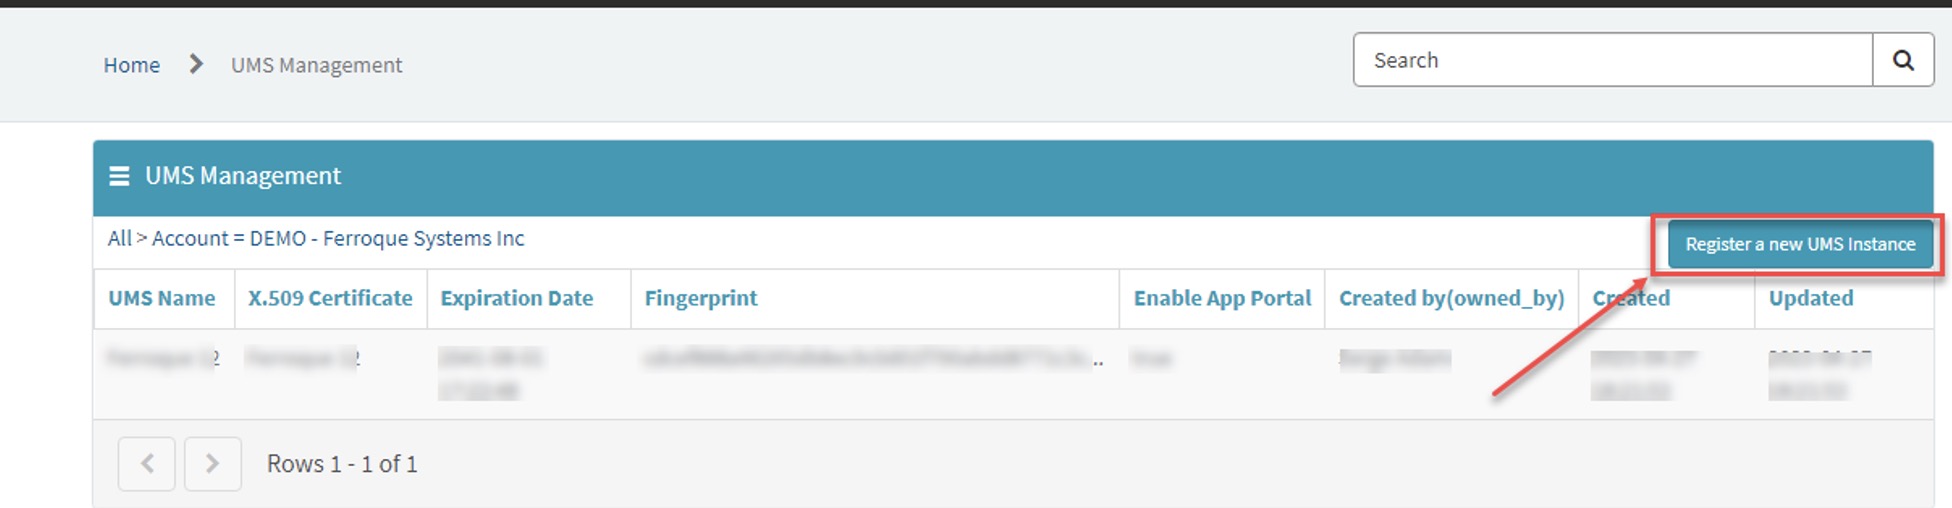
On the next screen, select “Register a new UMS instance”.
Give the UMS instance a name and upload the downloaded certificate.
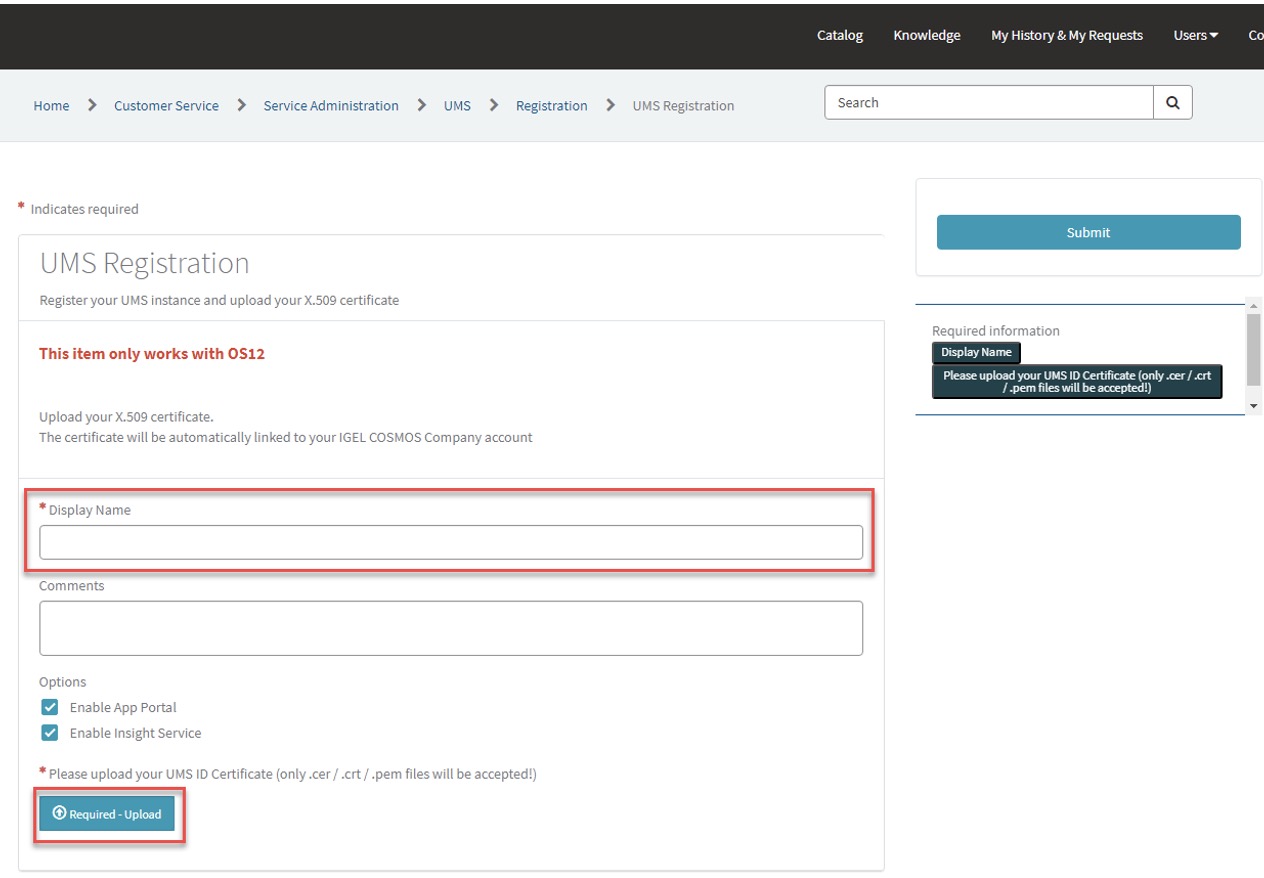
Your UMS server is now registered, and you can download apps.
Configuring UMS 12
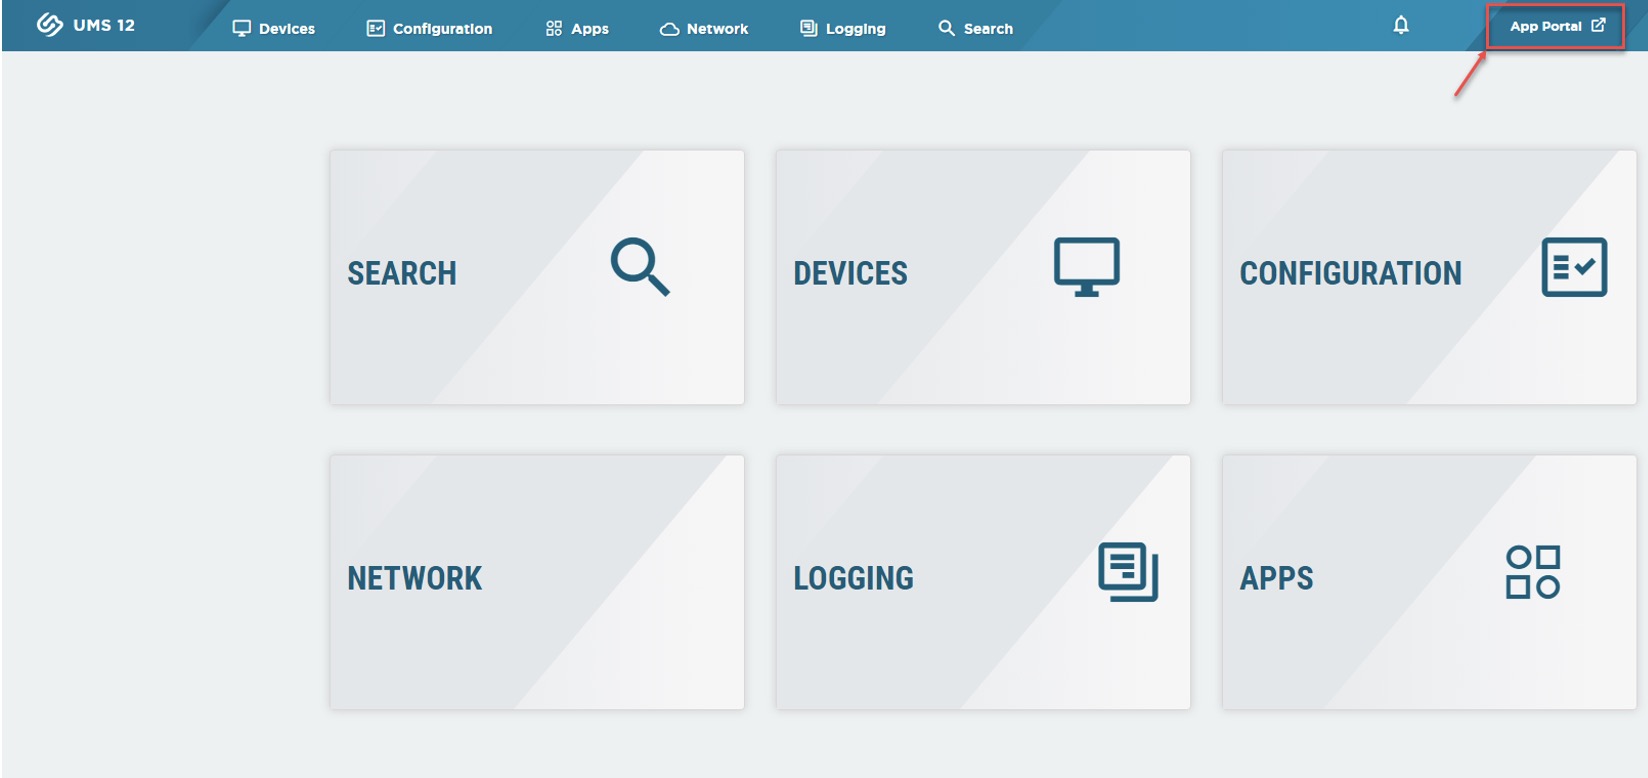
Go to https://<my_server>:8443/webapp/#/home and login.
Go to the app portal to download components.
You will be presented with a selection of available apps. As of this writing, the list is still very much a work in progress.
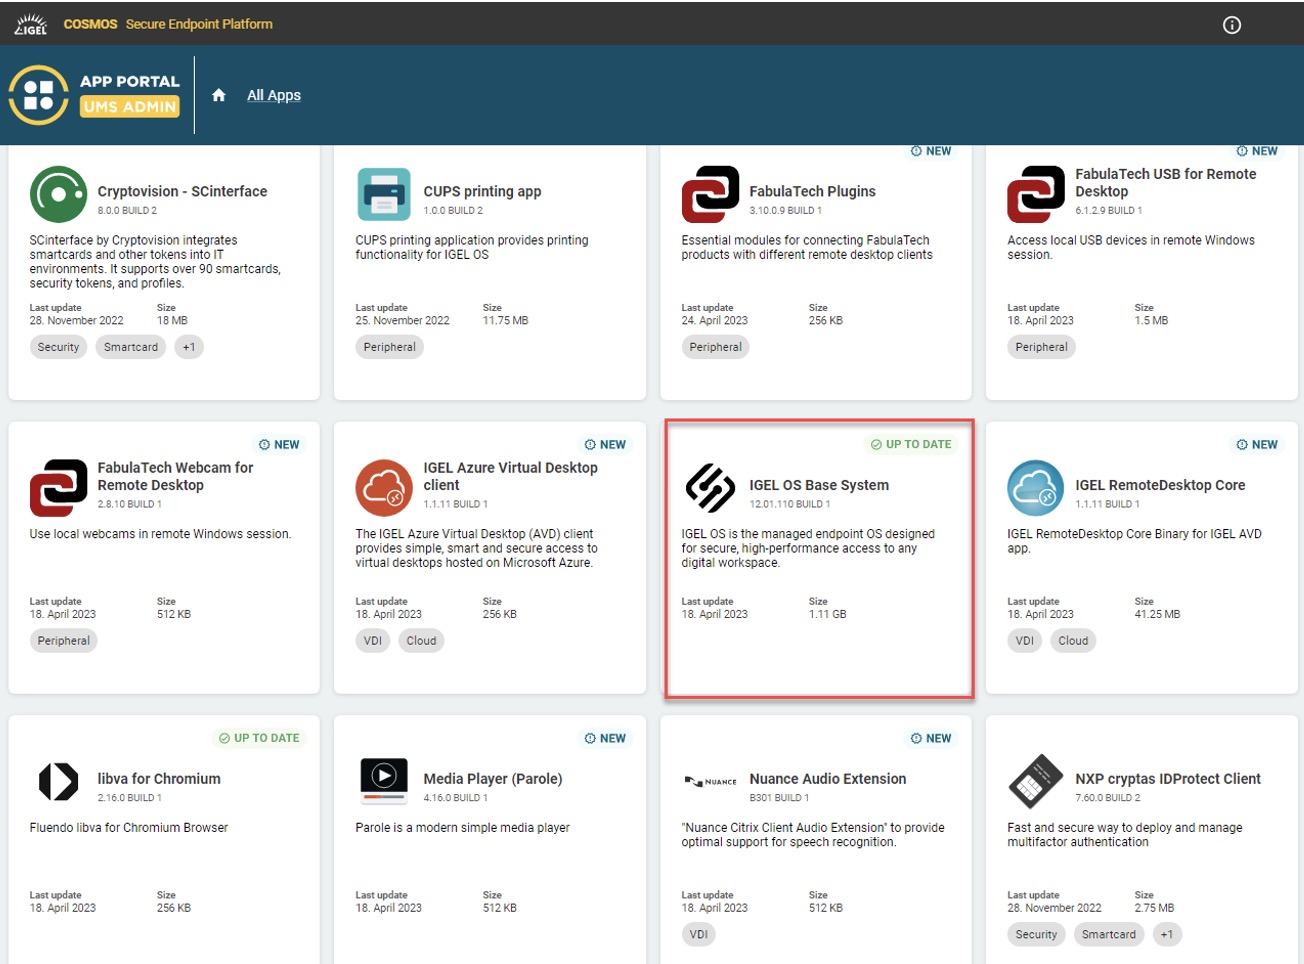
Apps marked “Up to date” are apps in your downloaded library. Apps marked New are available to download. Note that the IGEL 12 firmware is an app to download.
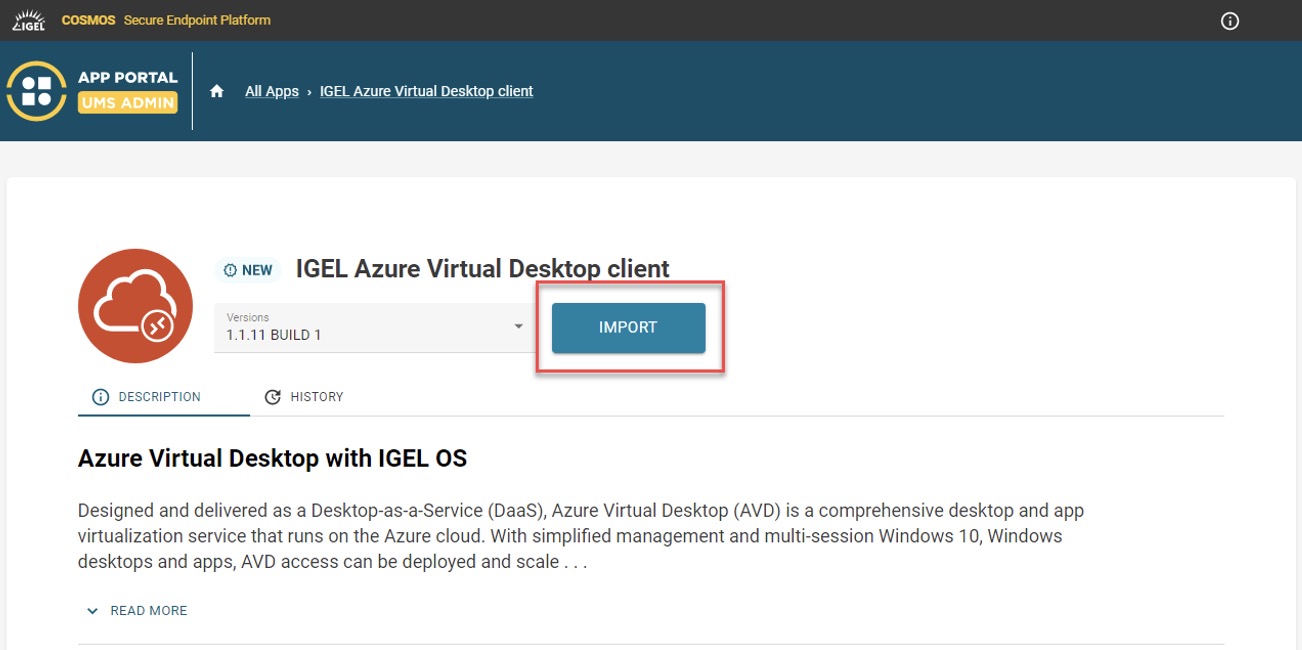
Click on the App to download and then click on Import.
Once you have downloaded your required Apps, you can proceed to configure profiles to push apps to groups of devices.
Creating Profiles
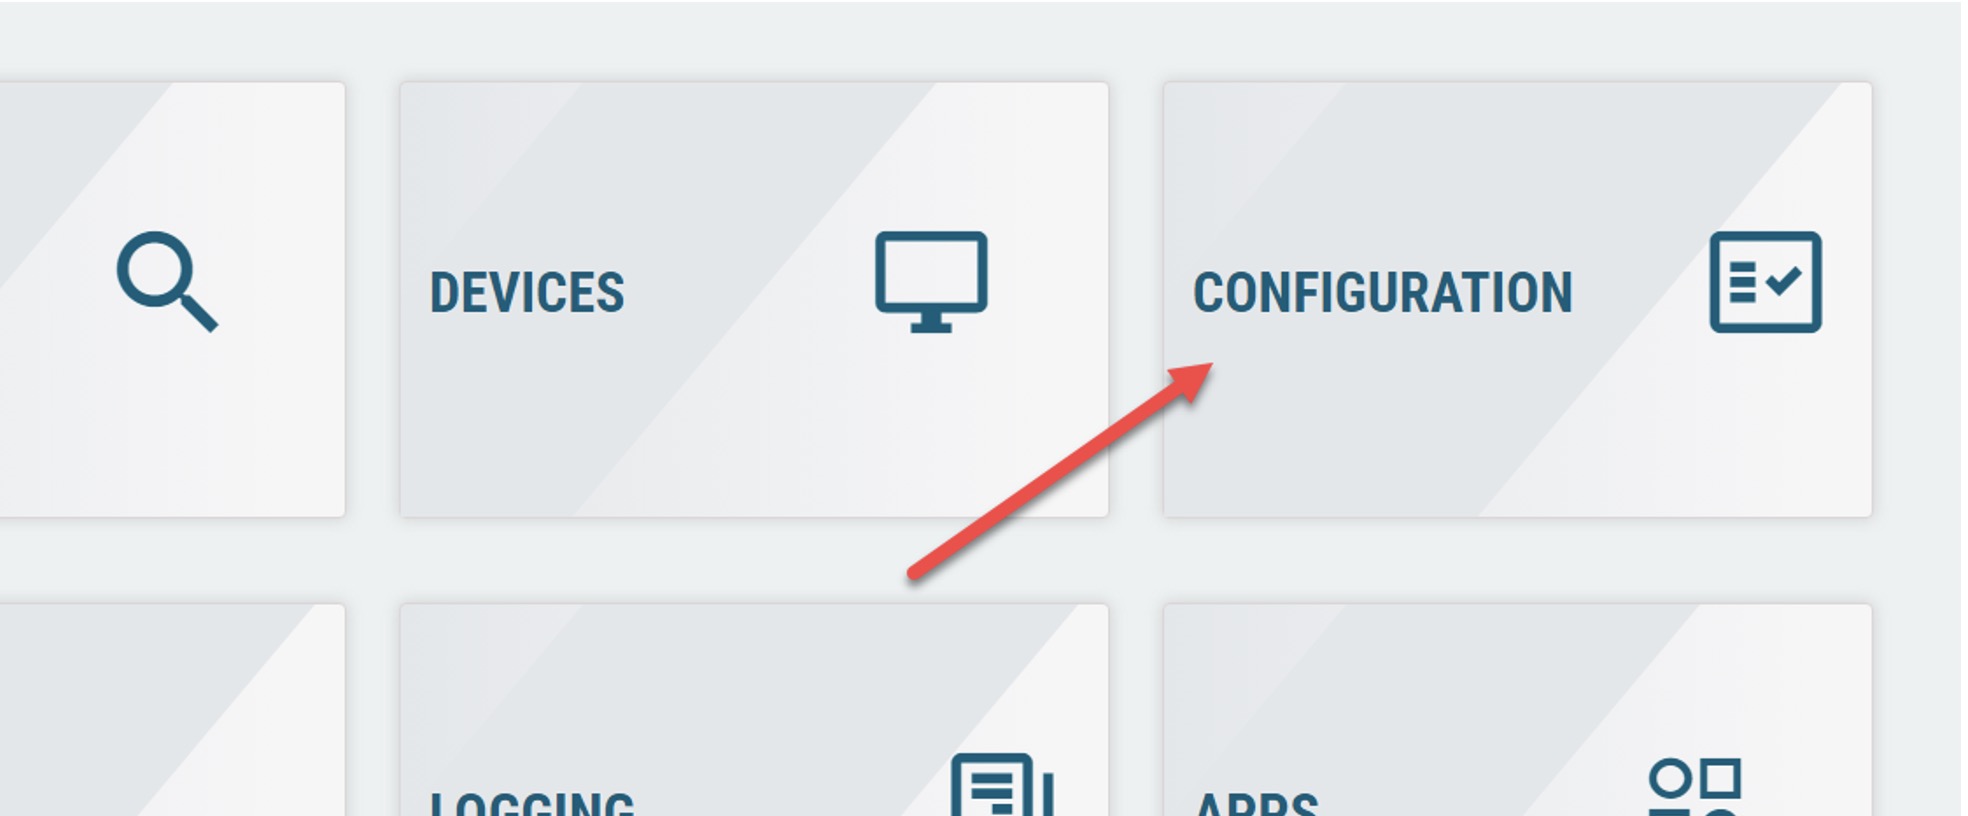
From the home page, select “Configuration”.
The configuration tree will show you the folders, and the policies contained within the folder.
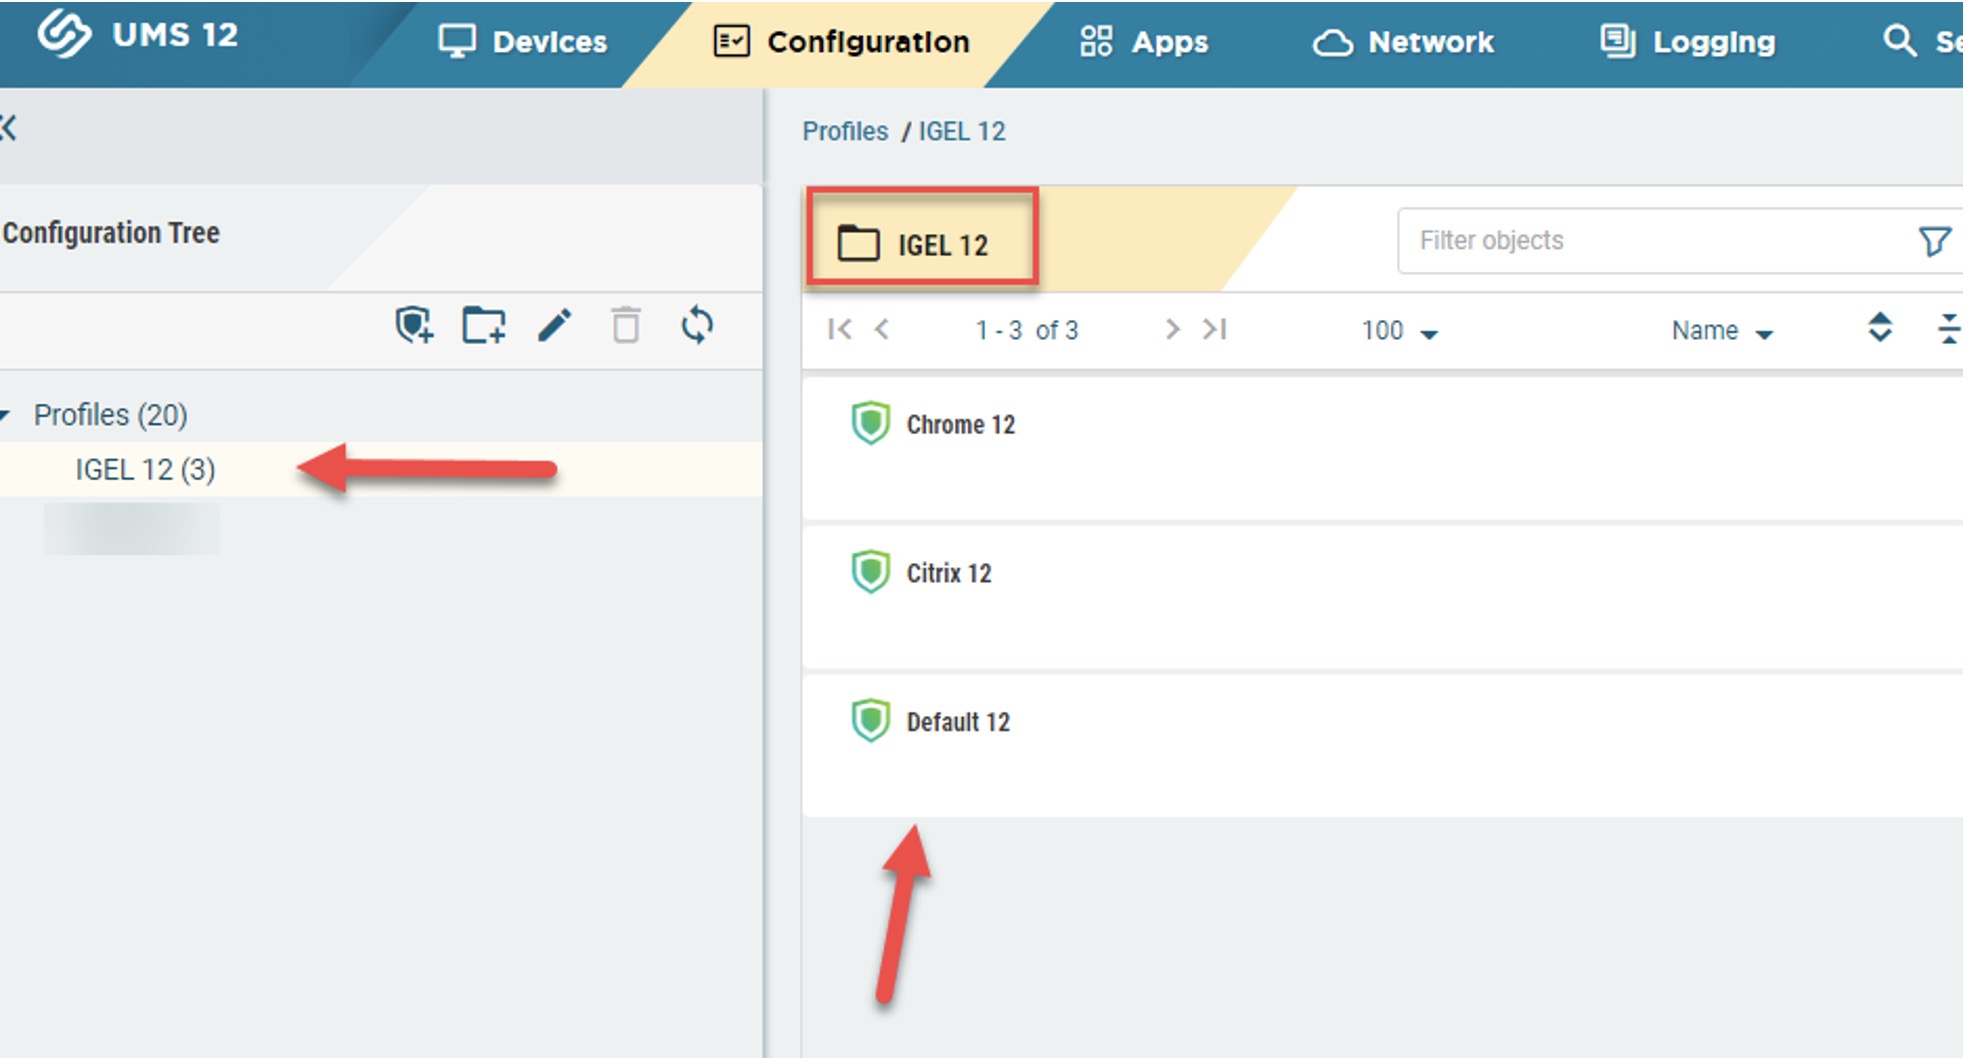
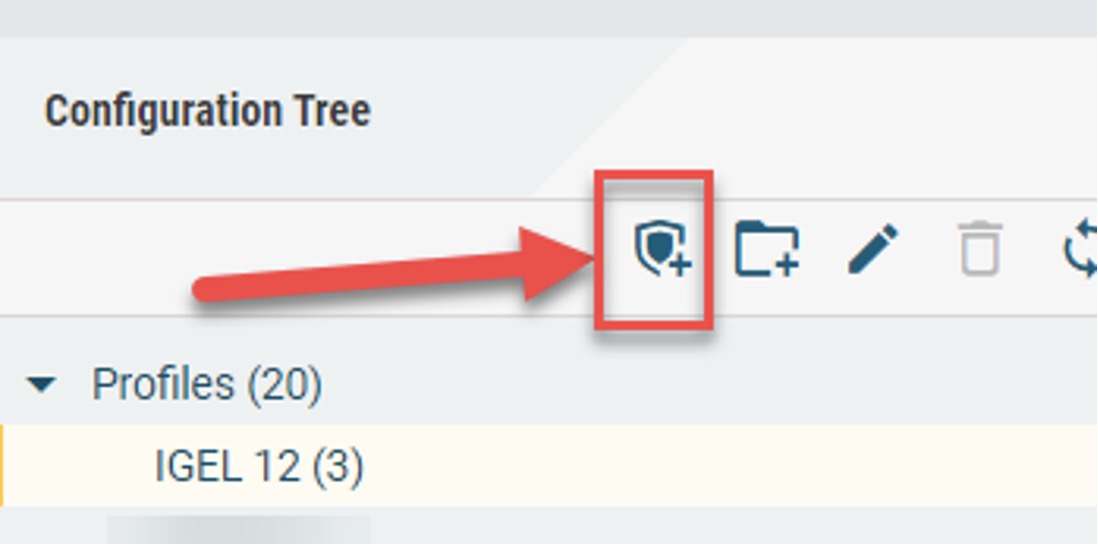
Select the create icon to create a new policy.
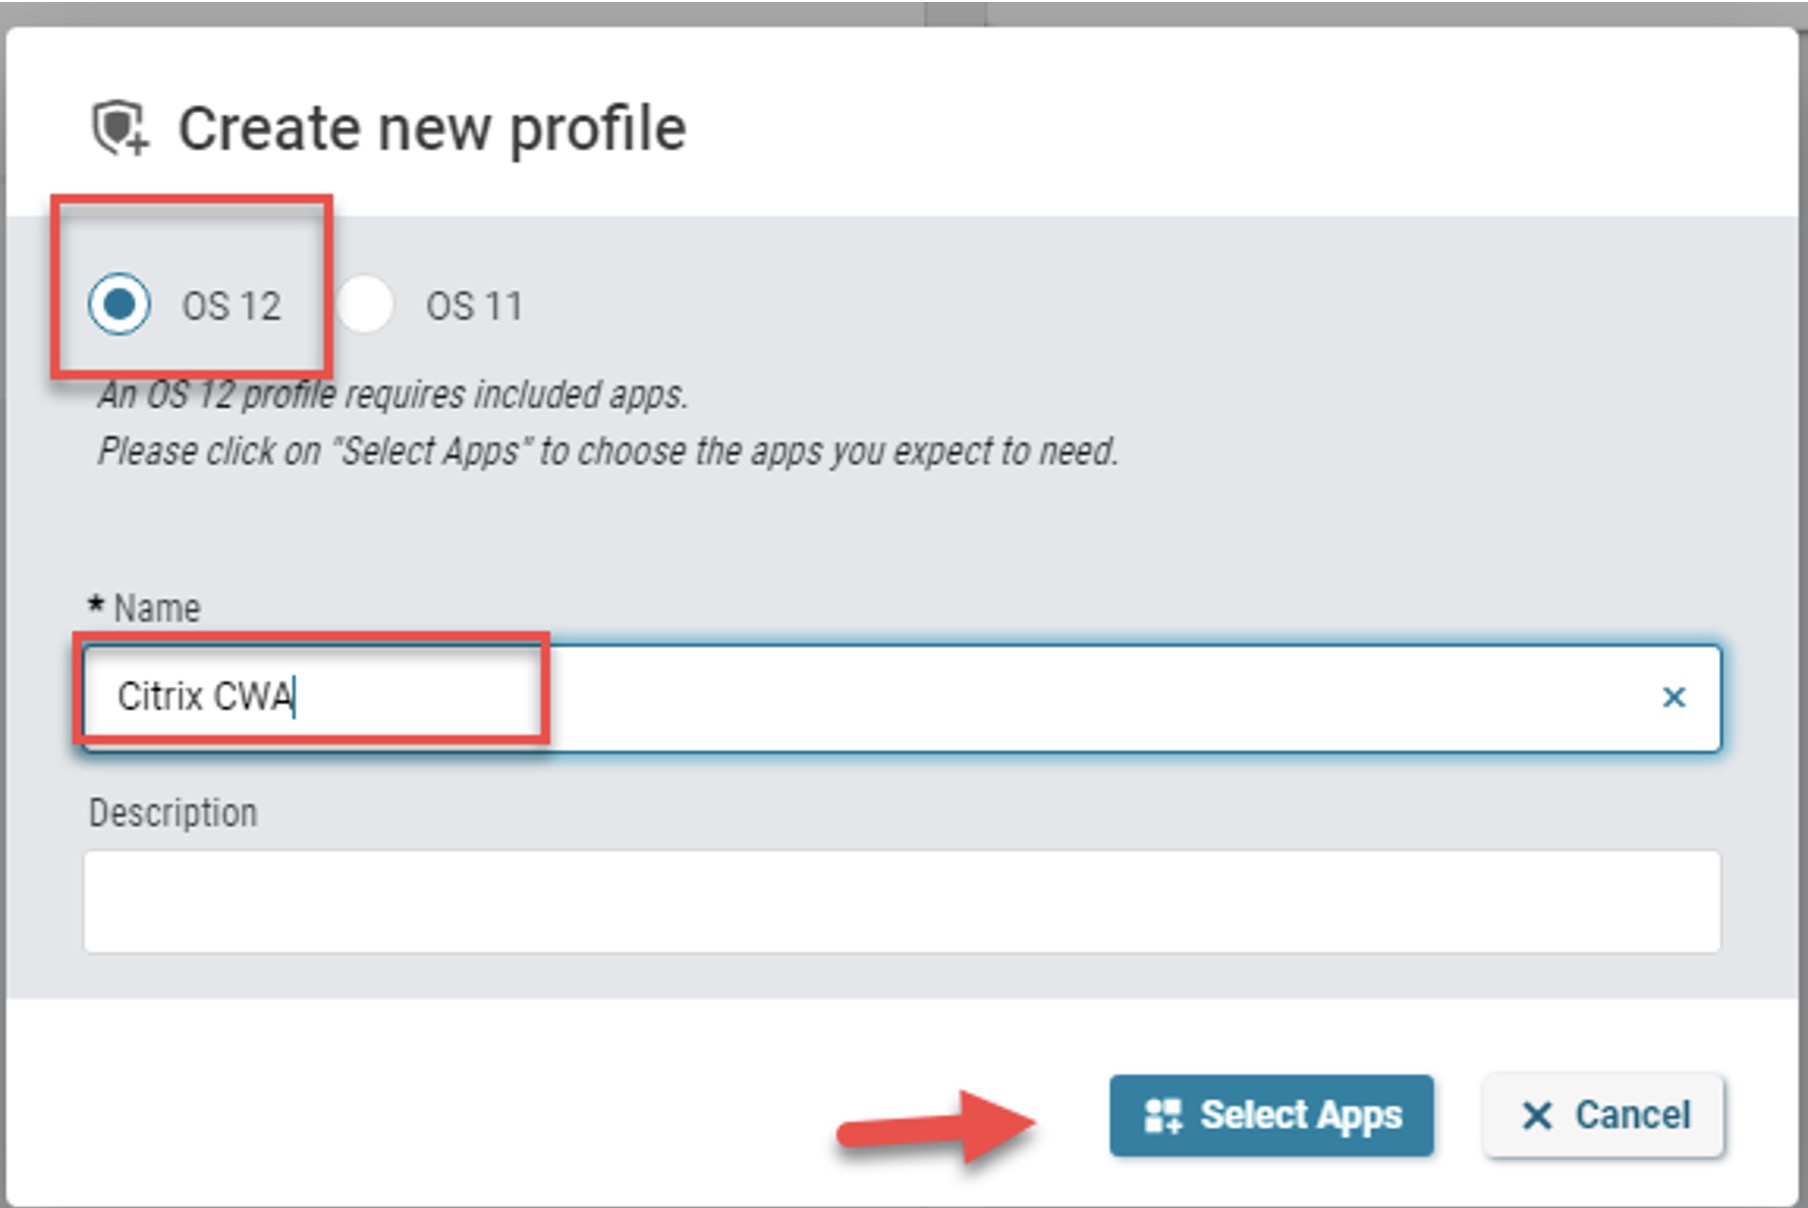
Select OS12, name the policy and click “Select Apps”.
The App Selector will show you all the apps you have downloaded. Select the app(s) you wish to include in the policy and click Save.
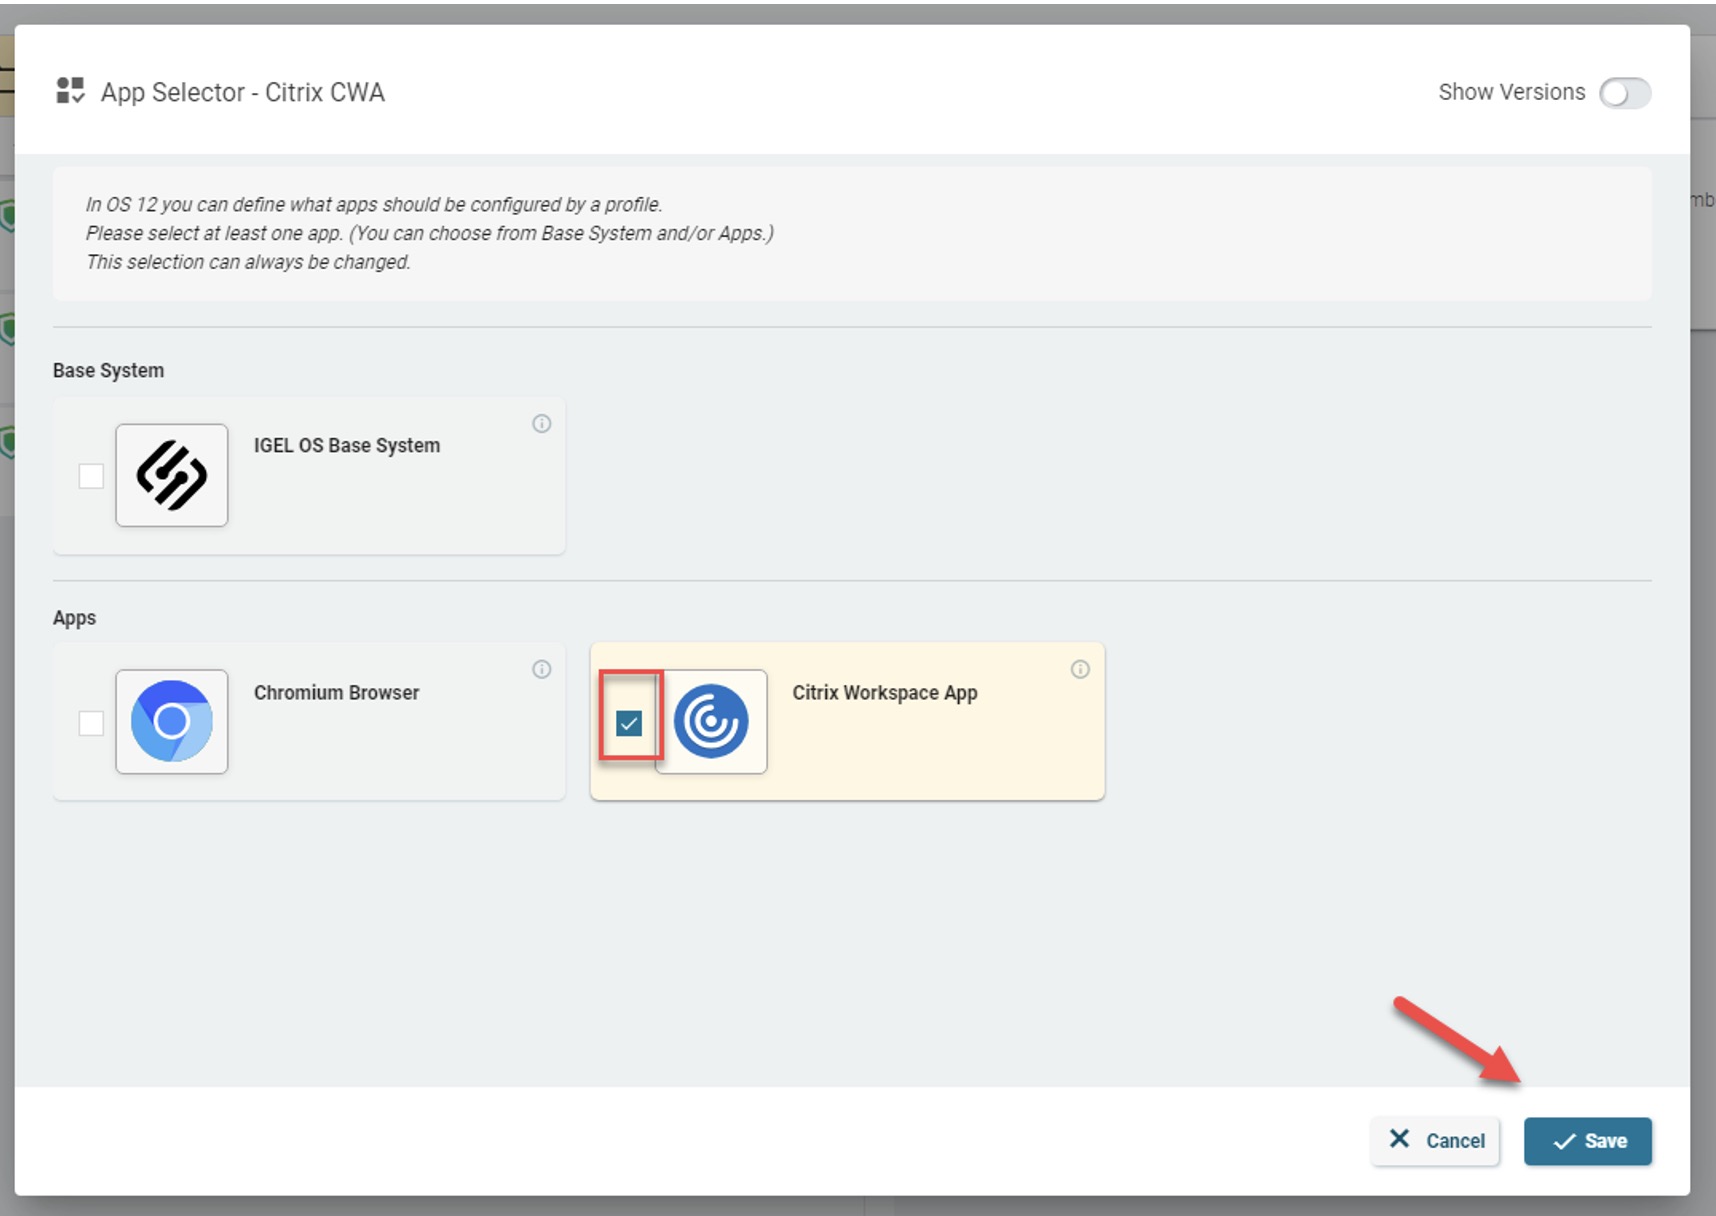
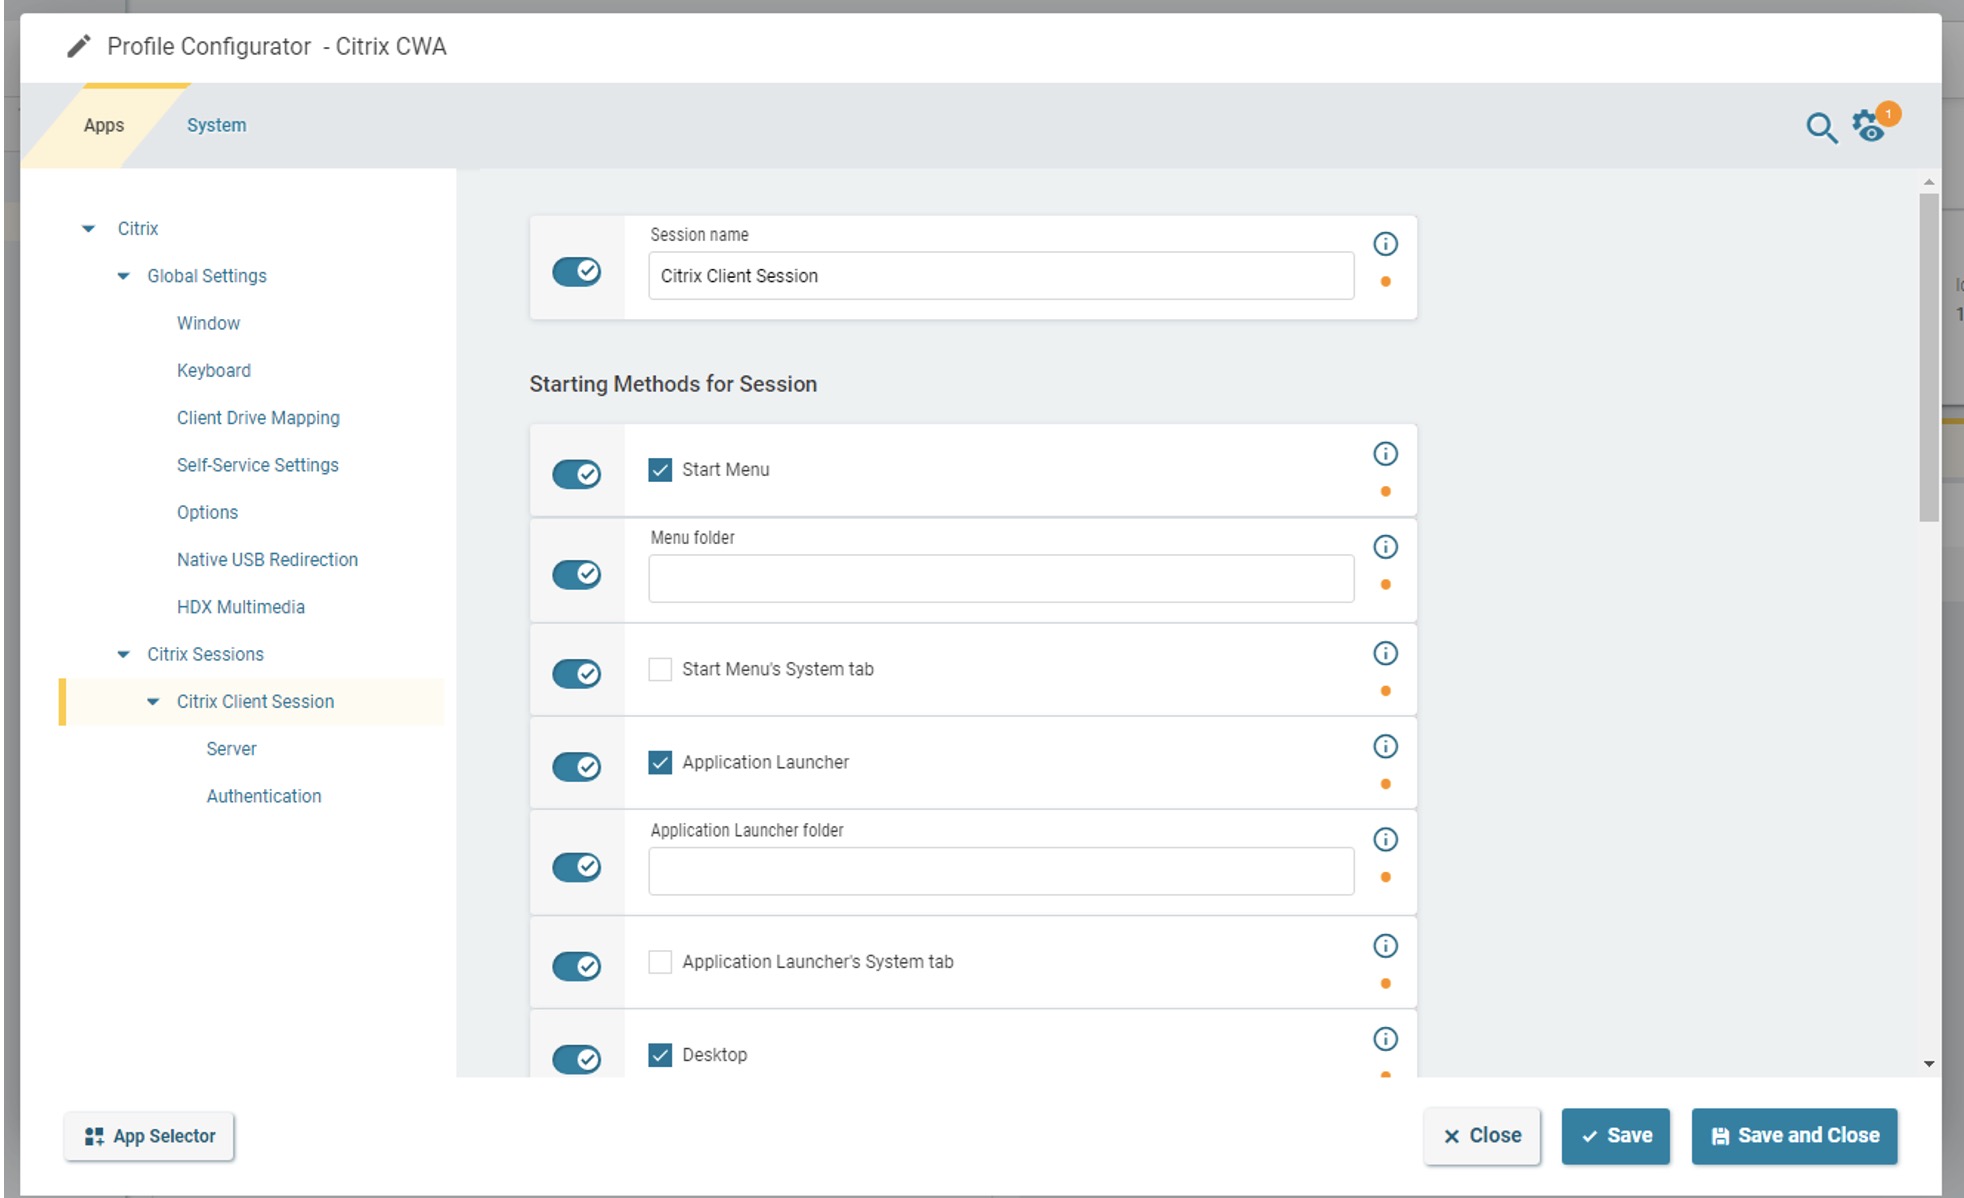
You can select all the configuration options for the app, including where the app icon will be displayed.
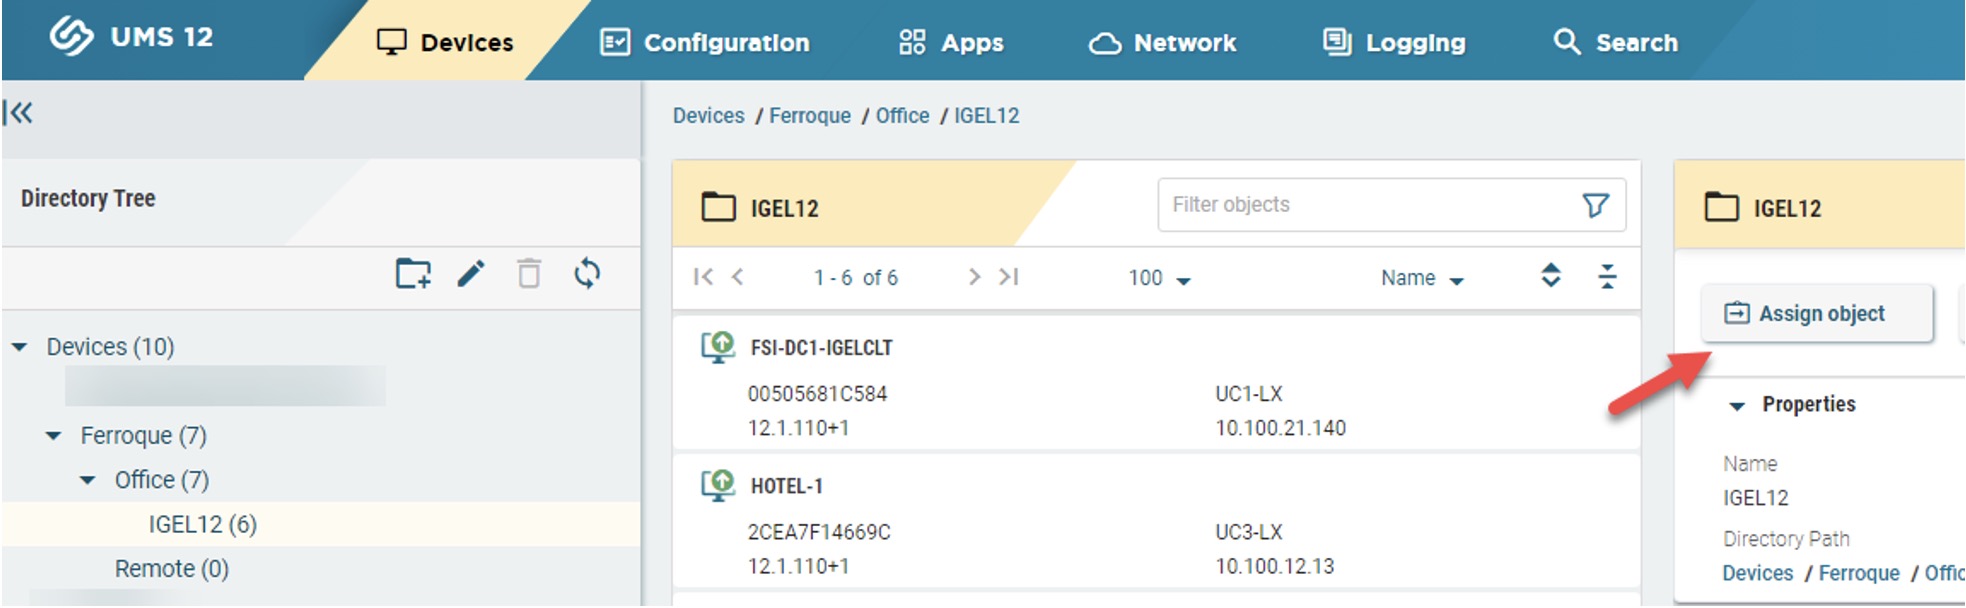
To assign the policy to devices, go to the devices tab.

Select the folder containing the devices, you will see a list of devices. You can either assign the entire folder, or a specific device. Click on Assign Object.
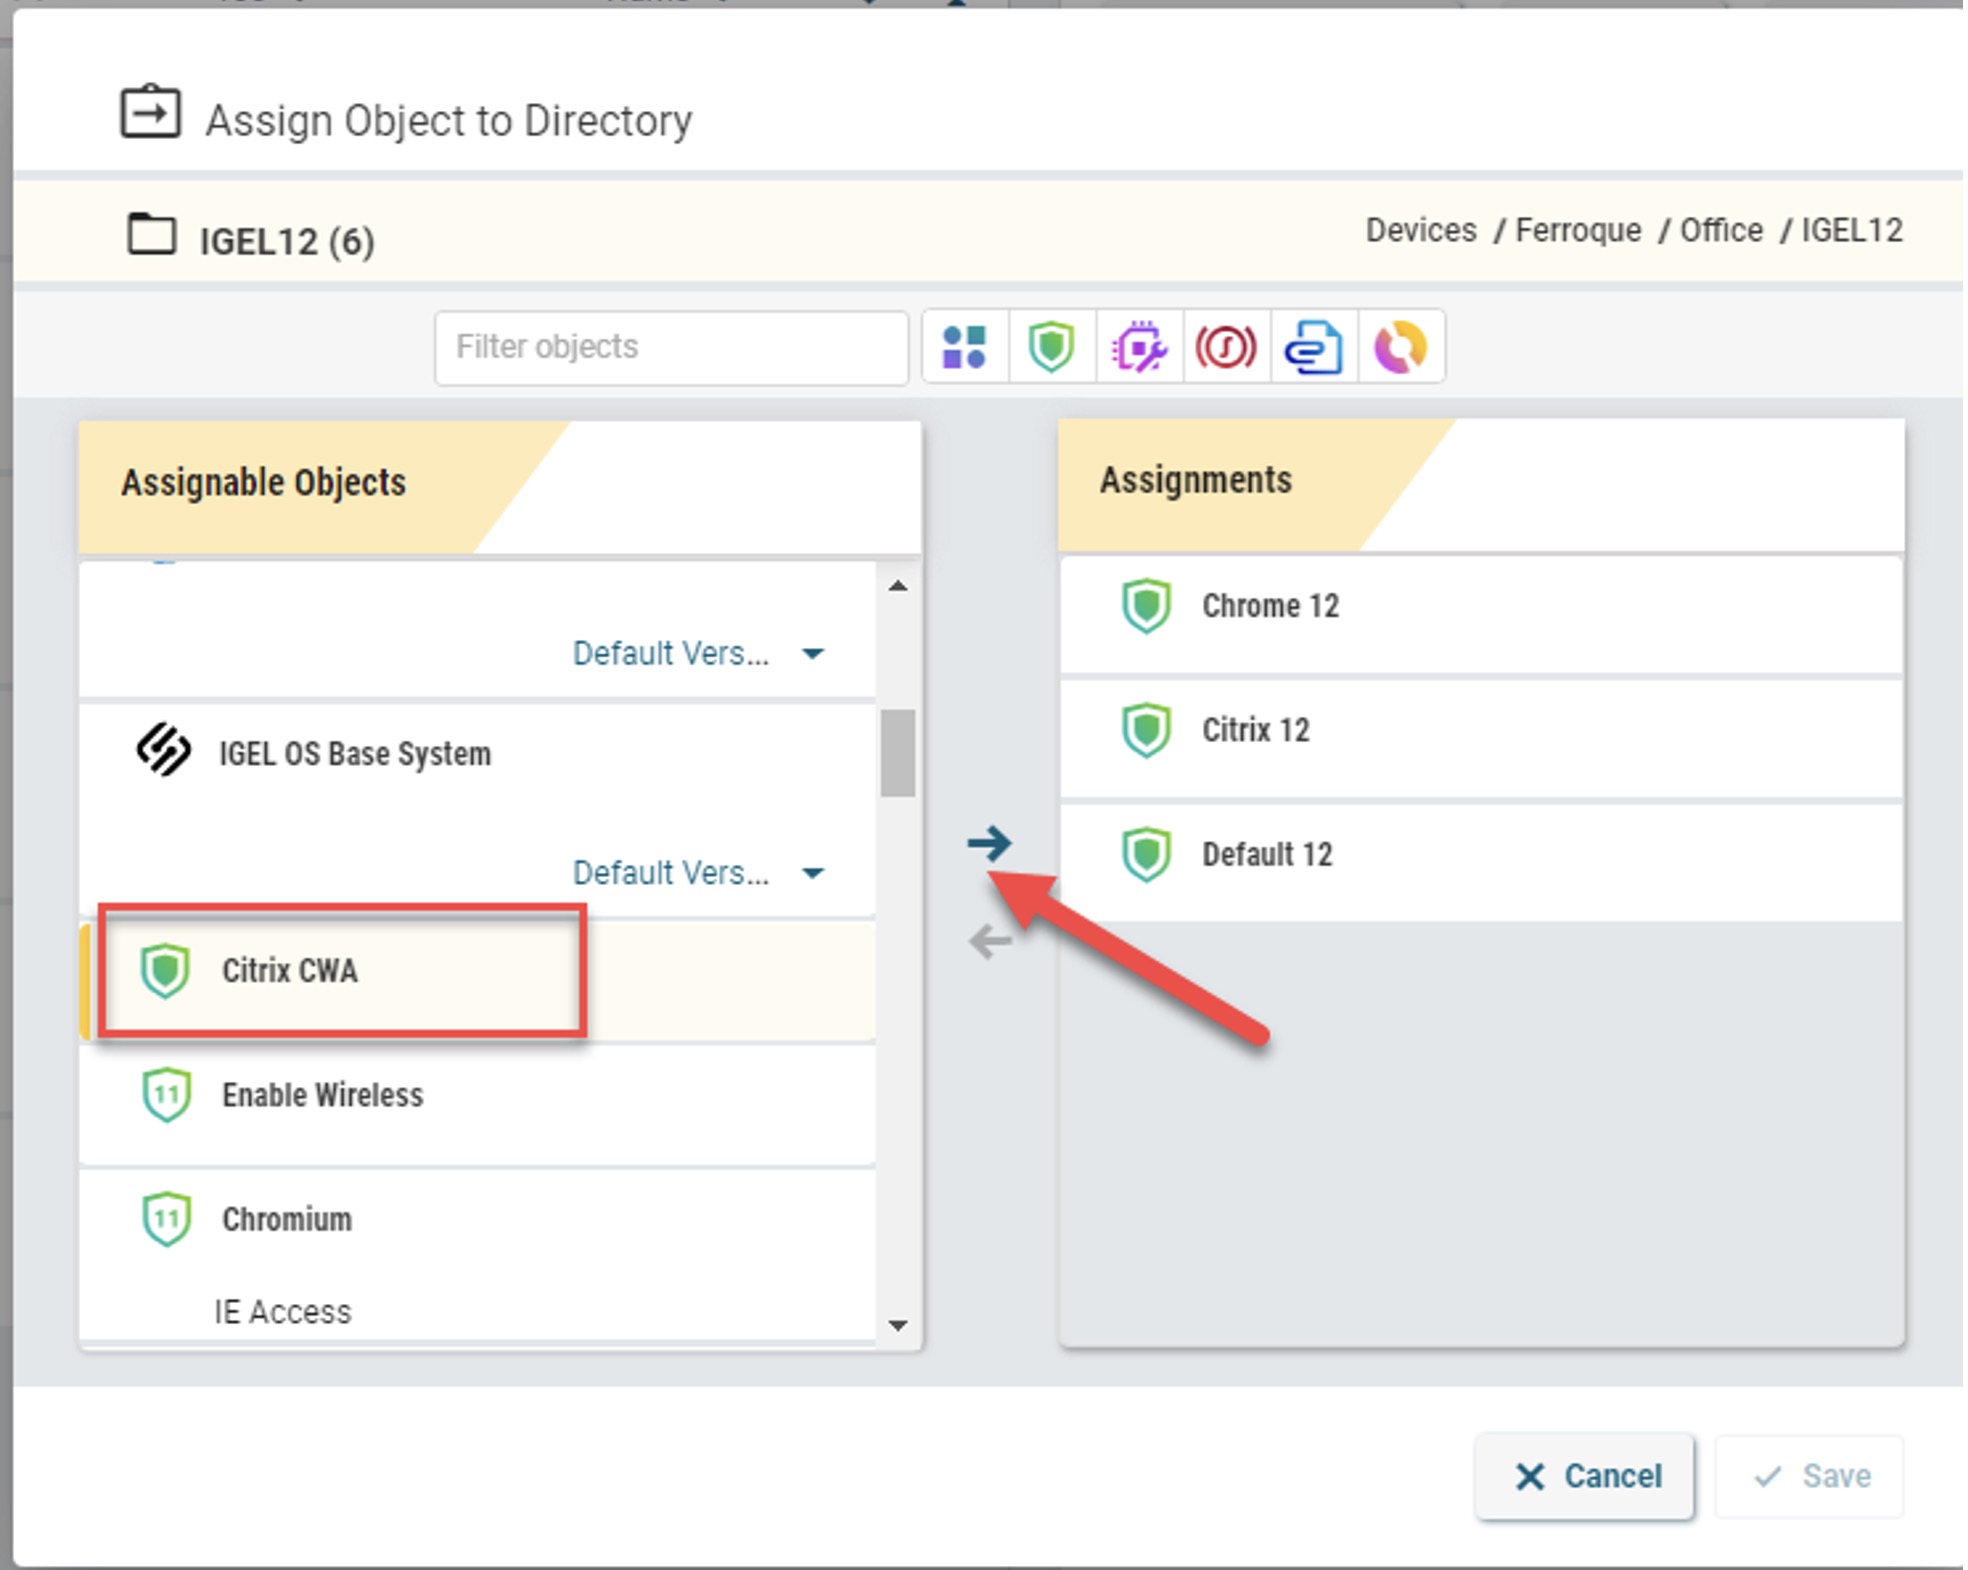
Scroll down the list until you find the policy, select it, and click the arrow to move it to the list on the right. Click Save”.
Conclusion
The new Web console is a work in progress. At this point, it can be used to configure endpoints. Over time, the server configuration will be moved to the Web console as well.