By default, a Windows OS will install itself creating a system reserved partition. When dealing with PVS and vDisk images, this may eventually bite you in the rear end either causing problems performing an initial vDisk creation, or through the inevitable reverse imaging process when one needs to update VM tools drivers for the NIC (unless you’re sneaky and do a cusotm install of the drivers, and circumvent updating the driver, which kind of defeats the point of VM tools updates).
For these reasons, we generally have recommended removing the system reserved partition from images as part of their build process to avoid issues down the road. This can be done during initial OS install, but more often than not, consultants are given an MDT orchestrated image to work with (unless dealing with App Layering where that almost never works… so build from ISO). So more often than not you’d conduct this purging work once the VM is build.
For years I was religiously following this excellent guide for various OSs to deal with the partition removal which, through a bunch of steps, one can remove the partition successfully. Except for our recent customer build which for some reason, be it Windows 10 or Windows 2016, it just wasn’t working. They swore up and down it was a very vanilla build. Who knows. After 45 minues of troubleshooting I was stumped.
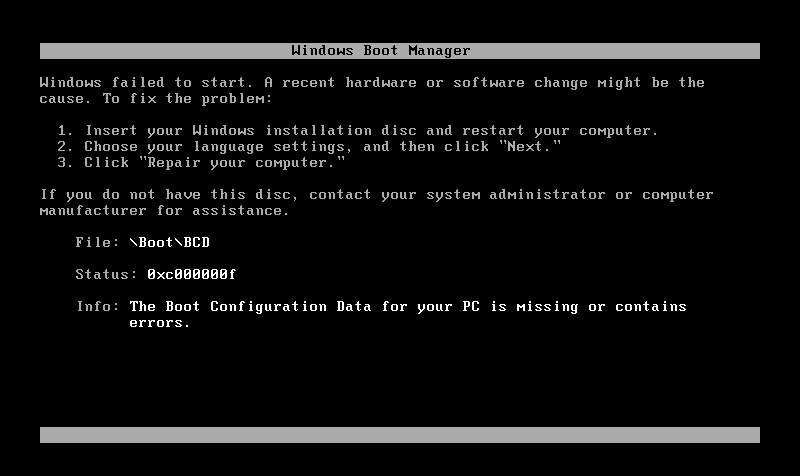
I’d been so used to following the meticulous instructions of that guide in artfully removing the partition from our images, I never wondered if there was a brutally simpler way. Turns out there was, and our consultant Reubin whose years of deskside experience paid off for us. Instead of attempting to migrate the configs with the OS online, one trashes them and performs a boot repair from OS ISO media and subsequently deletes the drive. I found this simpler than the previous method, even if it is a little less elegant.
Use the following steps bellow to remove the System Reserved Partition:
IMPORTANT – Take a snapshot before continuing, and remove it when completed and satisfied with the VM booting up.
You will need:
- Admin rights within the VM
- Hypervisor rights to mount ISOs, take snapshots, perform power actions on VMs
- ISO media for the OS being worked on
1.Power on VM and boot into Windows
2. Open Disk Management
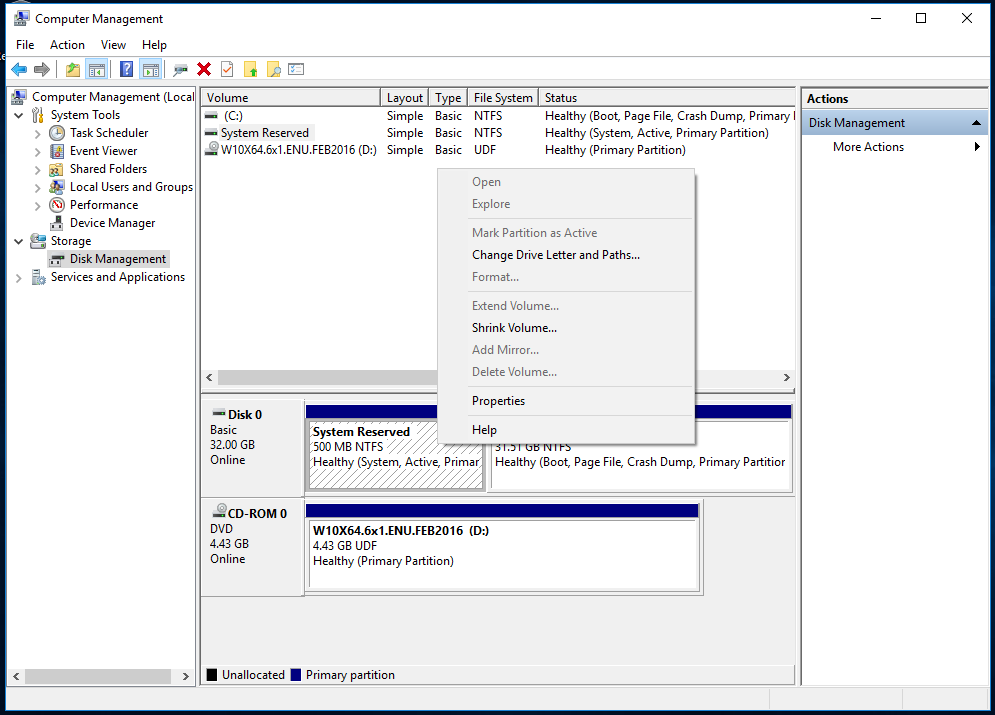
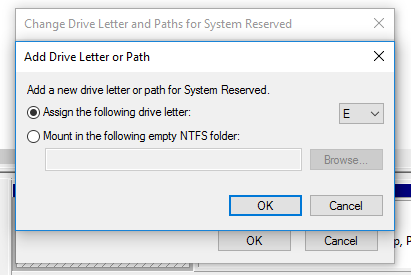
3. Assign System Reserved Partition a letter
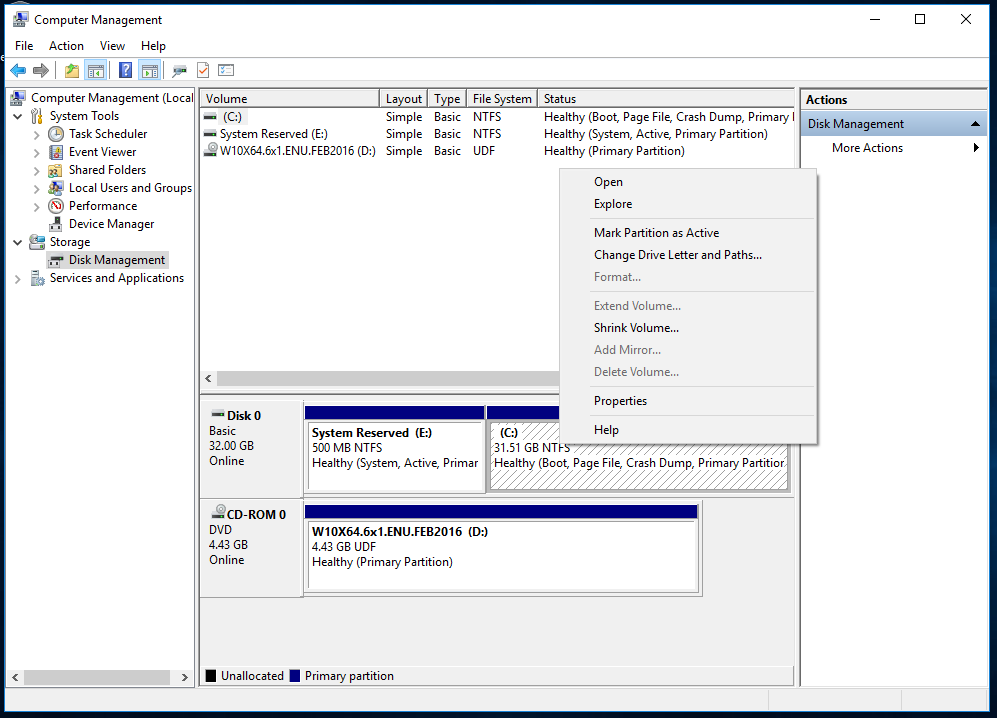
4. Right click C: (OS Drive) and press mark partition as active
5. Mount installation media to VM then shut down the VM.
6. Change VM or Physical PC to boot from media (Bios setting or select boot device on startup)
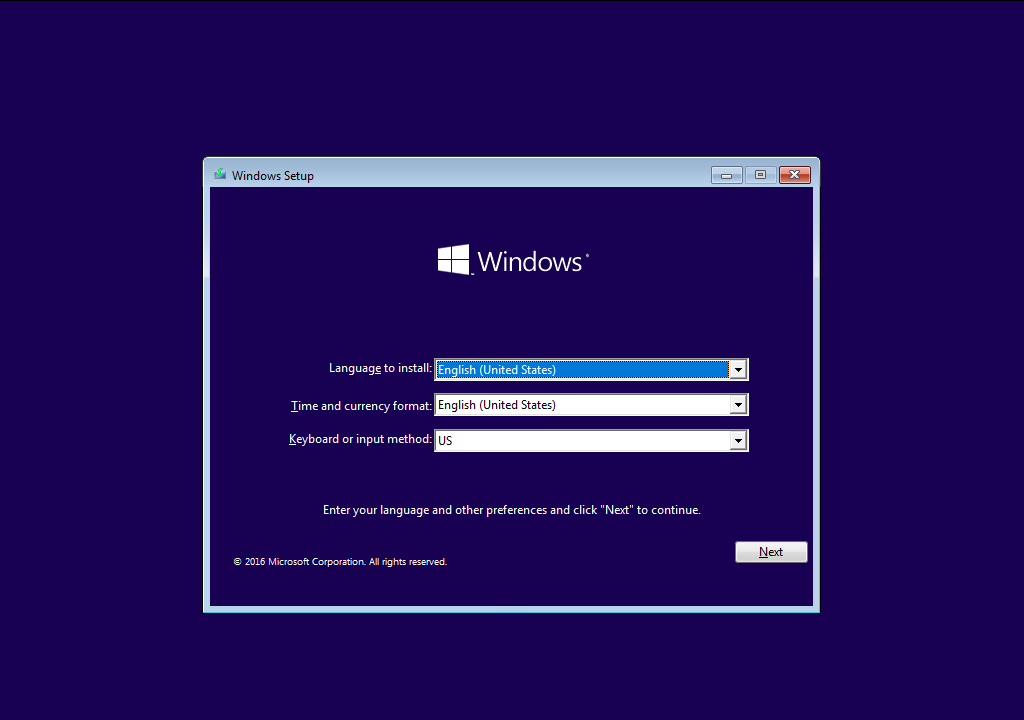
6. Boot into Windows installation media
7. Select Language and press next.
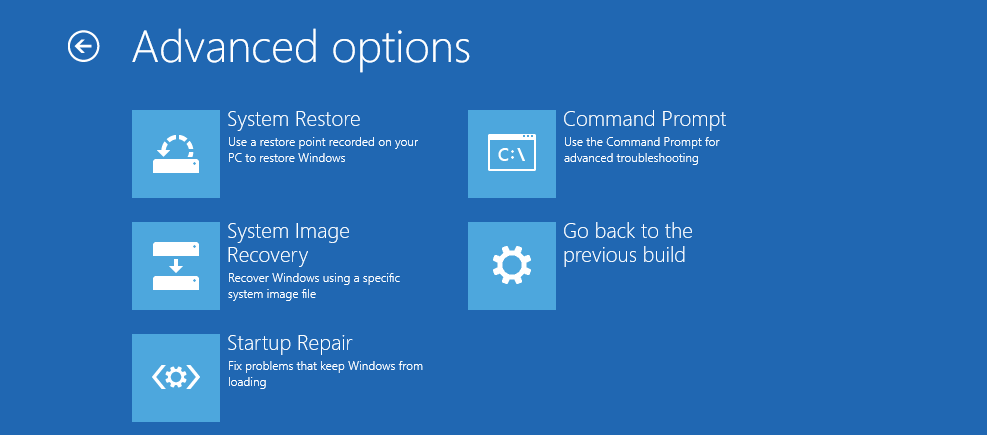
8. Select Repair your Computer
9. Select Troubleshoot

10. Select command prompt.
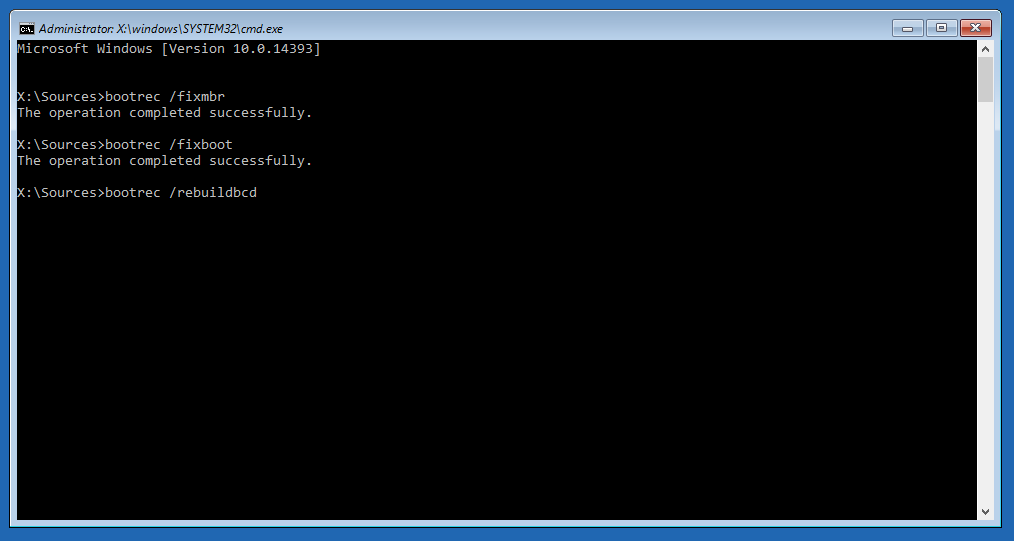
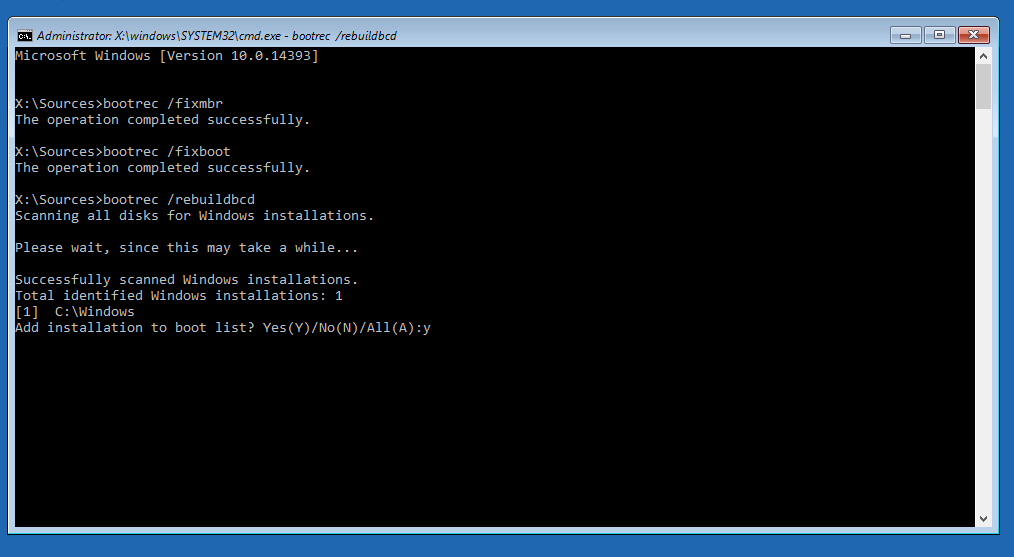
11. Run the following commands.
recboot /fixmbr
recboot /fixboot
recboot /rebuildbcd
12. Press y to add C: to boot list
13. Run the command exit to leave command prompt
14. Select Continue to boot back into Windows
15. Open Disk Management
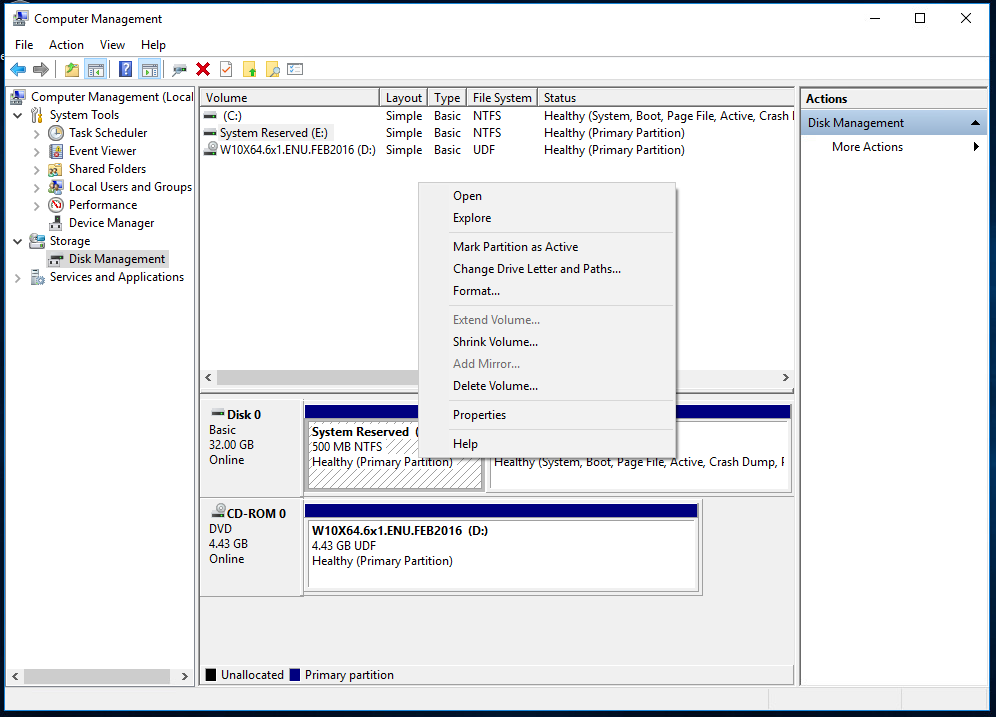
16. Hover over the System Reserved partition and right click to delete the partition.
17. Select Yes to continue
18. Reboot PC
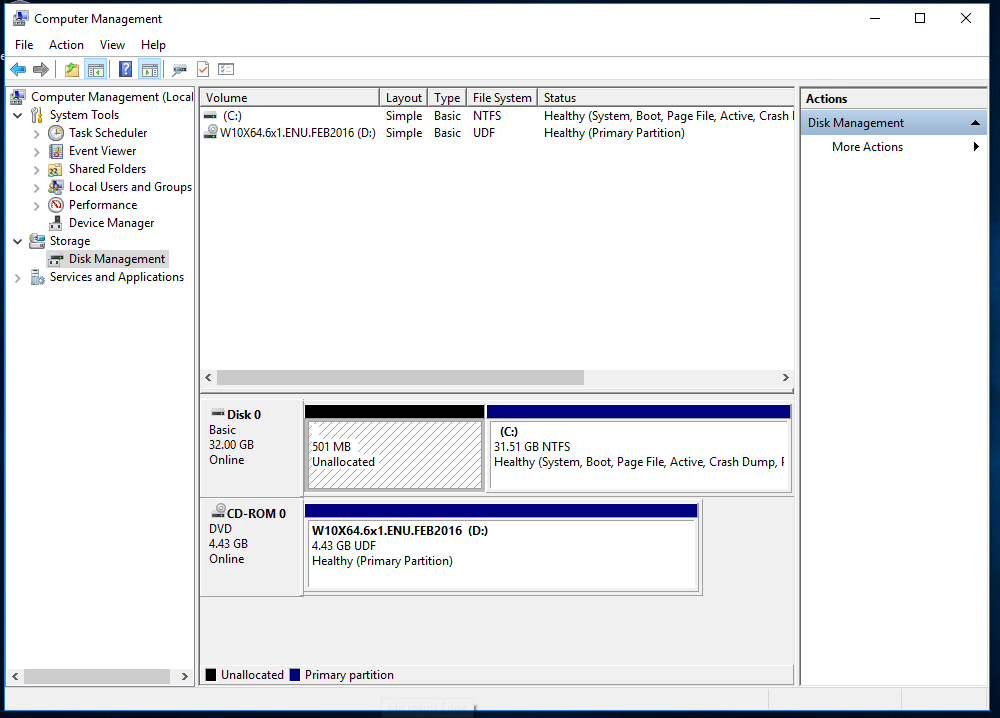
19. The system reserved partition is now removed and C: is the new active boot partition. Remove the snapshot from the VM once satisfied.
Update June 15, 2020: It has brought to my attention that these commands may not be working when using a Windows 10 ISO (Build 1709 or later). I have tested in lab and when using a newer Windows 10 ISO the command bootrec/ fixboot returns an “access is denied” error. In order to remediate this, you can use an older Win 10 ISO, a Server OS ISO or any other Windows PE ISO that contains the cmd prompt.