One of our managed services customers approached us with a request: if a user had a second login ID (like an
admin account), present them with a dropdown to choose which account to use. If they didn’t have a second
account, they should just proceed as normal with their single, pre-populated user ID. To raise the difficulty,
they wanted the username and password entered on the second factor, after the account choice, while
still keeping that username field pre-populated and locked.
My first reaction was that this wasn’t possible with a standard nFactor build. One of our engineers, Allen
Perry, thought otherwise, and we set out to prove it.
This post walks through a real-world nFactor build for a managed services customer who wanted users with
a second login ID to choose which account to use, without giving up a pre-populated, locked username field
on the password screen.
Starting Point: The Existing AAA Setup
The customer already had multiple AAA vServers in production, so we started by cloning their existing AAA
vServer configuration rather than building from scratch. Their first factor used SAML (via a third-party
identity provider), which we reused as-is — no changes were needed there, so we won’t cover that
configuration in this post.
Building the Dropdown Logic
The core of the new behavior lives in a policy label we’ll call dropdown_username, bound as the next factor
after the first-factor SAML authentication. This label doesn’t render anything to the user — it just evaluates
which path a user should take:
add authentication noAuthAction NO_AUTH_USERNAME_DROPDOWN_SELECTION
add authentication Policy DROPDOWN_USERID -rule "AAA.USER.ATTRIBUTE(3).EQ(\"ACCESS-DENIED\").NOT"
-action NO_AUTH_USERNAME_DROPDOWN_SELECTION
add authentication Policy NO_DROPDOWN_USERID -rule "AAA.USER.ATTRIBUTE(3).EQ(\"ACCESS-DENIED\")"
-action NO_AUTH_USERNAME_DROPDOWN_SELECTION
add authentication policylabel dropdown_username -loginSchema NOSCHEMA_LS
bind authentication policylabel dropdown_username -policyName DROPDOWN_USERID -priority 100 -
gotoPriorityExpression NEXT -nextFactor dropdown_username_only_pl
bind authentication policylabel dropdown_username -policyName NO_DROPDOWN_USERID -priority 110 -
gotoPriorityExpression NEXT -nextFactor multidomain_ldaps_pl
The logic hinges on AAA.USER.ATTRIBUTE(3). If a user has a second login, this attribute carries a real value
from the SAML response; if not, the identity provider returns the literal string “ACCESS-DENIED.” That single
check is what silently splits users into “gets the dropdown” and “proceeds as usual.”
This also required a modification to the SAML Server to add the additional login attribute that could be
collected at login and included in the policies. This was accomplished by editing the SAML Action.
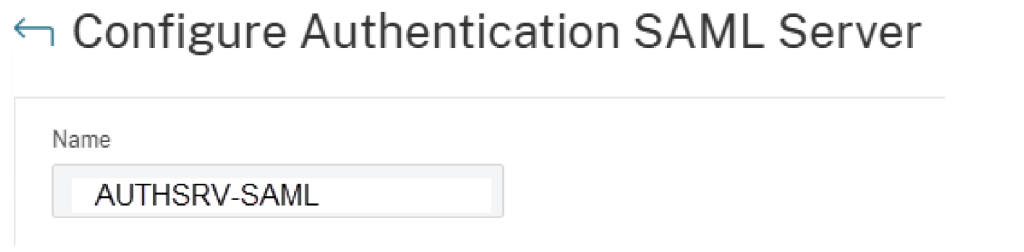
Expand the “more” section.
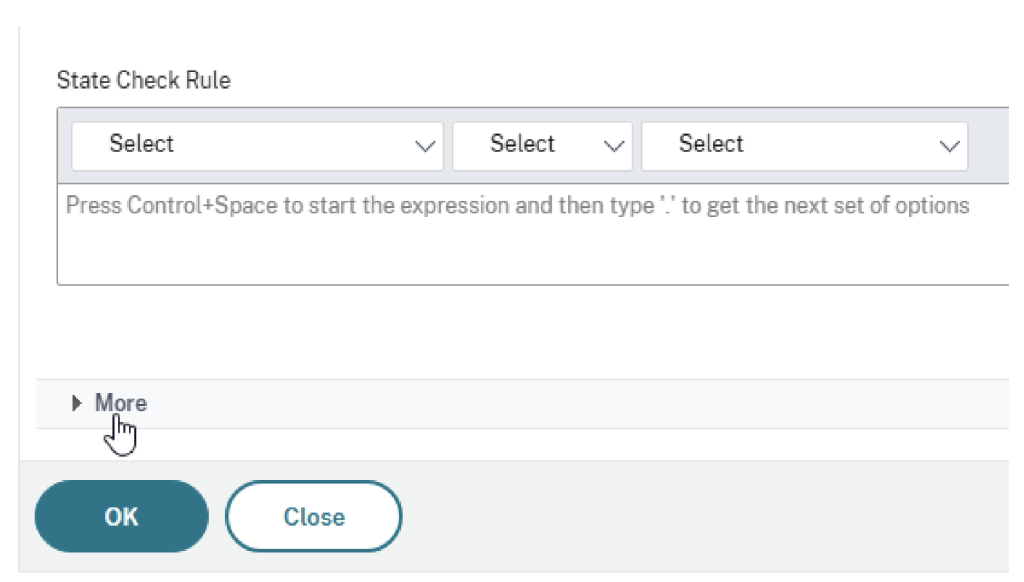
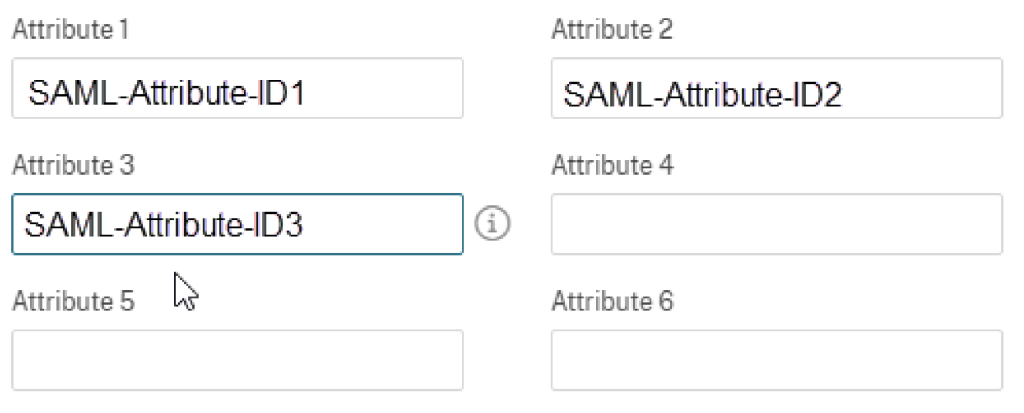
And adding the identity of the third attribute. Any attribute number could be used as long as it was also
used in the policy expression.
Users who don’t qualify for the dropdown are routed to multidomain_ldaps_pl — the customer’s pre-existing
single-login flow, untouched by any of this configuration.
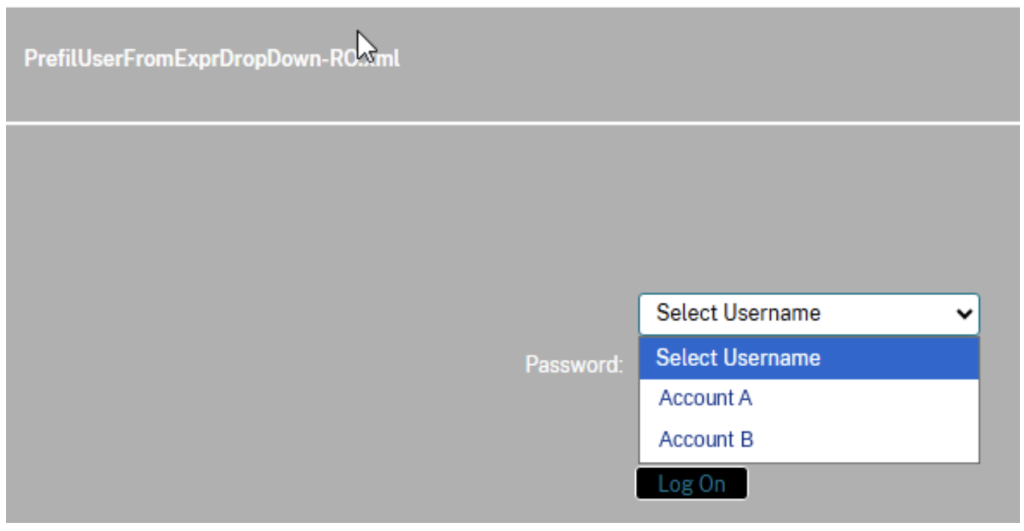
Users who do qualify for the dropdown move to dropdown_username_only_pl, which is where the actual
selection screen appears:
add authentication loginSchema account_dropdown_ls -authenticationSchema
"/nsconfig/loginschema/AccountDropdown.xml"
add authentication policylabel dropdown_username_only_pl -loginSchema account_dropdown_ls
add authentication Policy USERNAME_DROPDOWN_ACCTA -rule
"HTTP.REQ.BODY(256).AFTER_STR(\"domain=\").BEFORE_STR(\"&\").EQ(\"AcctA\")" -action
NO_AUTH_USERNAME_DROPDOWN_SELECTION
add authentication Policy USERNAME_DROPDOWN_ACCTB -rule
"HTTP.REQ.BODY(256).AFTER_STR(\"domain=\").BEFORE_STR(\"&\").EQ(\"AcctB\")" -action
NO_AUTH_USERNAME_DROPDOWN_SELECTION
bind authentication policylabel dropdown_username_only_pl -policyName USERNAME_DROPDOWN_ACCTA -
priority 110 -gotoPriorityExpression NEXT -nextFactor multidomain_acctA_pl
bind authentication policylabel dropdown_username_only_pl -policyName USERNAME_DROPDOWN_ACCTB -
priority 120 -gotoPriorityExpression NEXT -nextFactor multidomain_acctB_pl
This label’s login schema is the one that actually draws the dropdown UI. Whatever account the user picks
gets read back out of the submitted form body and routed to one of two account-specific policy labels, each
with its own login schema controlling how the next screen pre-populates the username.
Walking the Flow: Three Scenarios
It’s easier to see how this all fits together by tracing three real login paths through the configuration login
workflow above.
Scenario 1 — A standard user with only one login
The user authenticates via the first-factor SAML step. Their SAML response comes back with
AAA.USER.ATTRIBUTE(3) set to “ACCESS-DENIED,” since they do not have a second account. At the
dropdown_username decision point, NO_DROPDOWN_USERID matches, and the user is routed straight to
multidomain_ldaps_pl — the customer’s original, pre-existing login flow. They never see a dropdown at all;
the username field is pre-populated exactly as it always was, using the login schema already in place before
this project began.
Scenario 2 — A dual-login user selecting Account A
This user’s SAML response carries a real value in AAA.USER.ATTRIBUTE(3) — not “ACCESS-DENIED” — so
DROPDOWN_USERID matches and they land on the dropdown screen (dropdown_username_only_pl). The
user selects Account A from the list. The form submission is evaluated by USERNAME_DROPDOWN_ACCTA,
which routes them to multidomain_acctA_pl. This policy label’s login schema pre-populates the username
field using ${AAA.USER.ATTRIBUTE(3)} — the same attribute that flagged the user as a dual-login user in the
first place. The field is locked from editing; the user enters only their password, which is then validated
against the appropriate backend LDAP policy.
Scenario 3 — A dual-login user selecting Account B
Same starting point as Scenario 2 — the user has a real value in attribute 3 and reaches the dropdown. This
time the user selects Account B. USERNAME_DROPDOWN_ACCTB matches and routes them to
multidomain_acctB_pl. Here’s where the two paths genuinely differ under the hood: this policy label’s login
schema pre-populates the username using ${AAA.USER.NAME} rather than a SAML attribute index — for
reasons covered in the next section. The result looks identical to the user: a locked, pre-filled username field,
followed by a password prompt and normal LDAP validation.
From the user’s perspective, all three scenarios end up at what looks like the exact same login screen. The
policy branching that gets them there — and the small but important difference in how the username gets
filled in for Account A versus Account B — is the part that took real trial and error to work out.
The Bug: Inconsistent Pre-Population
While building out the login flow above, we hit a snag that only showed up when testing Account B
specifically. Account A’s login schema pre-populated the username field exactly as designed. Account B’s
schema locked the field from editing but left it blank.
At first glance, this didn’t make sense: both schemas used the same base template (PrefilUserFromExpr), just
pointed at different variables, and both were built the same way we’d built other working schemas in the
past. A support ticket was opened with NetScaler Support, and several rounds of configuration changes
followed without resolving the issue.
Root Cause and Fix
Eventually, NetScaler Engineering suggested comparing the actual expressions used to prefill the username
field across both schemas and for good measure. The one we knew was already working (Account A’s):
Account A schema (working from the start)
 <InitialValue>${AAA.USER.ATTRIBUTE(3)}</InitialValue>

 Account B schema — ORIGINAL (broken)
- <InitialValue>${AAA.USER.ATTRIBUTE(2)}</InitialValue>

 Account B schema — FIXED
+ <InitialValue>${AAA.USER.NAME}</InitialValue>
Every other line in these login schema files — the ReadOnly flag, the password field, the confirmation step,
the login button — was byte-for-byte identical. The entire functional difference came down to a single
expression.
The reason attribute 3 worked and attribute 2 didn’t work traced back to the SAML configuration itself.
Attribute 2 had been left at its default mapping and was never actually being populated with a value, while
attribute 3 was explicitly configured to carry the second login ID. So AAA.USER.ATTRIBUTE(2) wasn’t wrong
syntactically — it was just always empty. The ReadOnly flag still applied regardless, which is why the field
was locked but blank instead of throwing an error. That’s a subtle enough failure mode that it took a full
support engagement to isolate.
The fix was to stop relying upon a SAML attribute index for Account B and instead pull the username from
AAA.USER.NAME, which NetScaler populates internally regardless of how the SAML response maps its
attributes.
One important catch: modifying an existing login schema does not force NetScaler to reload it. Editing the
broken schema file in place and rebinding it did not reliably pick up the change. The fix required creating a
brand-new login schema XML file with the corrected expression, and binding that new file to the policy label.
Once that was done, both dropdown branches behaved identically: pre-populated, locked, and correct.
What We Learned
What started as “no, this can’t be done” ended up being entirely achievable with nFactor — the pieces were
all standard NetScaler building blocks, just assembled in a slightly unusual order. Single-login users see no
change at all. Dual-login users get a clean account dropdown, followed by a password screen with their
chosen username already filled in and locked, regardless of which account they picked.
The trickiest part wasn’t the dropdown logic itself — it was a single SAML attribute that looked correct on
paper but was never actually populated. If you’re building something similar, it’s worth double- and triple-checking exactly which attribute index your identity provider is populating before wiring a login schema to it.
And if you do need to change a login schema mid-project, don’t just edit the file — bind a new one. Learn more about
If you’re working through a complex NetScaler authentication requirement in your own environment, Ferroque Systems can help. Reach out to our team to discuss your use case and determine the right approach.